Nitric SQL Databases with PostgreSQL
This guide demonstrates how to use PostgreSQL with Nitric's SQL database feature. We will be creating a simple to-do app. The finished source can be found here.
Create a new Nitric project
The first step is to create a new Nitric TypeScript project using the Nitric CLI.
nitric new todo-app ts-starter
Enabling SQL databases
SQL databases are currently in Preview. To enable this feature in your project, add the following to your nitric.yaml file:
preview:- sql-databases
Add a PostgreSQL client
In this guide, we'll use the node-postgres library, but feel free to use another client of your choice and adjust the steps accordingly.
npm install pg
Create a Nitric SQL Database and Connect to it
Use Nitric’s sql feature to create a new SQL database, then use .connectionString() and the pg library to connect to it.
import { sql } from '@nitric/sdk'import { Client } from 'pg'const db = sql('todo-db', {migrations: 'file://migrations/todos',})let client: Clientconst getClient = async () => {if (!client) {const connectionString = await db.connectionString()client = new Client({ connectionString })await client.connect()}return client}export default getClient
Database Migrations
Create a migration file to define the todos table.
CREATE TABLE IF NOT EXISTS todos (id SERIAL PRIMARY KEY,content TEXT NOT NULL,done BOOLEAN DEFAULT FALSE);
Developing the API
Building the API
Delete the services/hello.ts file and create a new one called todos.ts, which will contain our API endpoints.
import { api } from '@nitric/sdk'import getClient from '../resources/db'const mainApi = api('main')// Fetch all todosmainApi.get('/todos', async (ctx) => {const client = await getClient()const result = await client.query('SELECT * FROM todos ORDER BY id ASC')return ctx.res.json(result.rows)})// Insert a new todomainApi.post('/todos/', async (ctx) => {const { content } = ctx.req.json()const client = await getClient()await client.query('INSERT INTO todos (content, done) VALUES ($1, $2)', [content,false,])})// Update content of a todomainApi.patch('/todos/:id', async (ctx) => {const { id } = ctx.req.paramsconst { content } = ctx.req.json()const client = await getClient()await client.query('UPDATE todos SET content = $1 WHERE id = $2', [content,parseInt(id),])})// Toggle todo completion statusmainApi.patch('/todos/:id/toggle', async (ctx) => {const { id } = ctx.req.paramsconst client = await getClient()await client.query('UPDATE todos SET done = NOT done WHERE id = $1', [parseInt(id),])})// Delete a todomainApi.delete('/todos/:id', async (ctx) => {const { id } = ctx.req.paramsconst client = await getClient()await client.query('DELETE FROM todos WHERE id = $1', [parseInt(id)])})
Start testing with nitric start
Run nitric start to start your local database and APIs.
nitric start
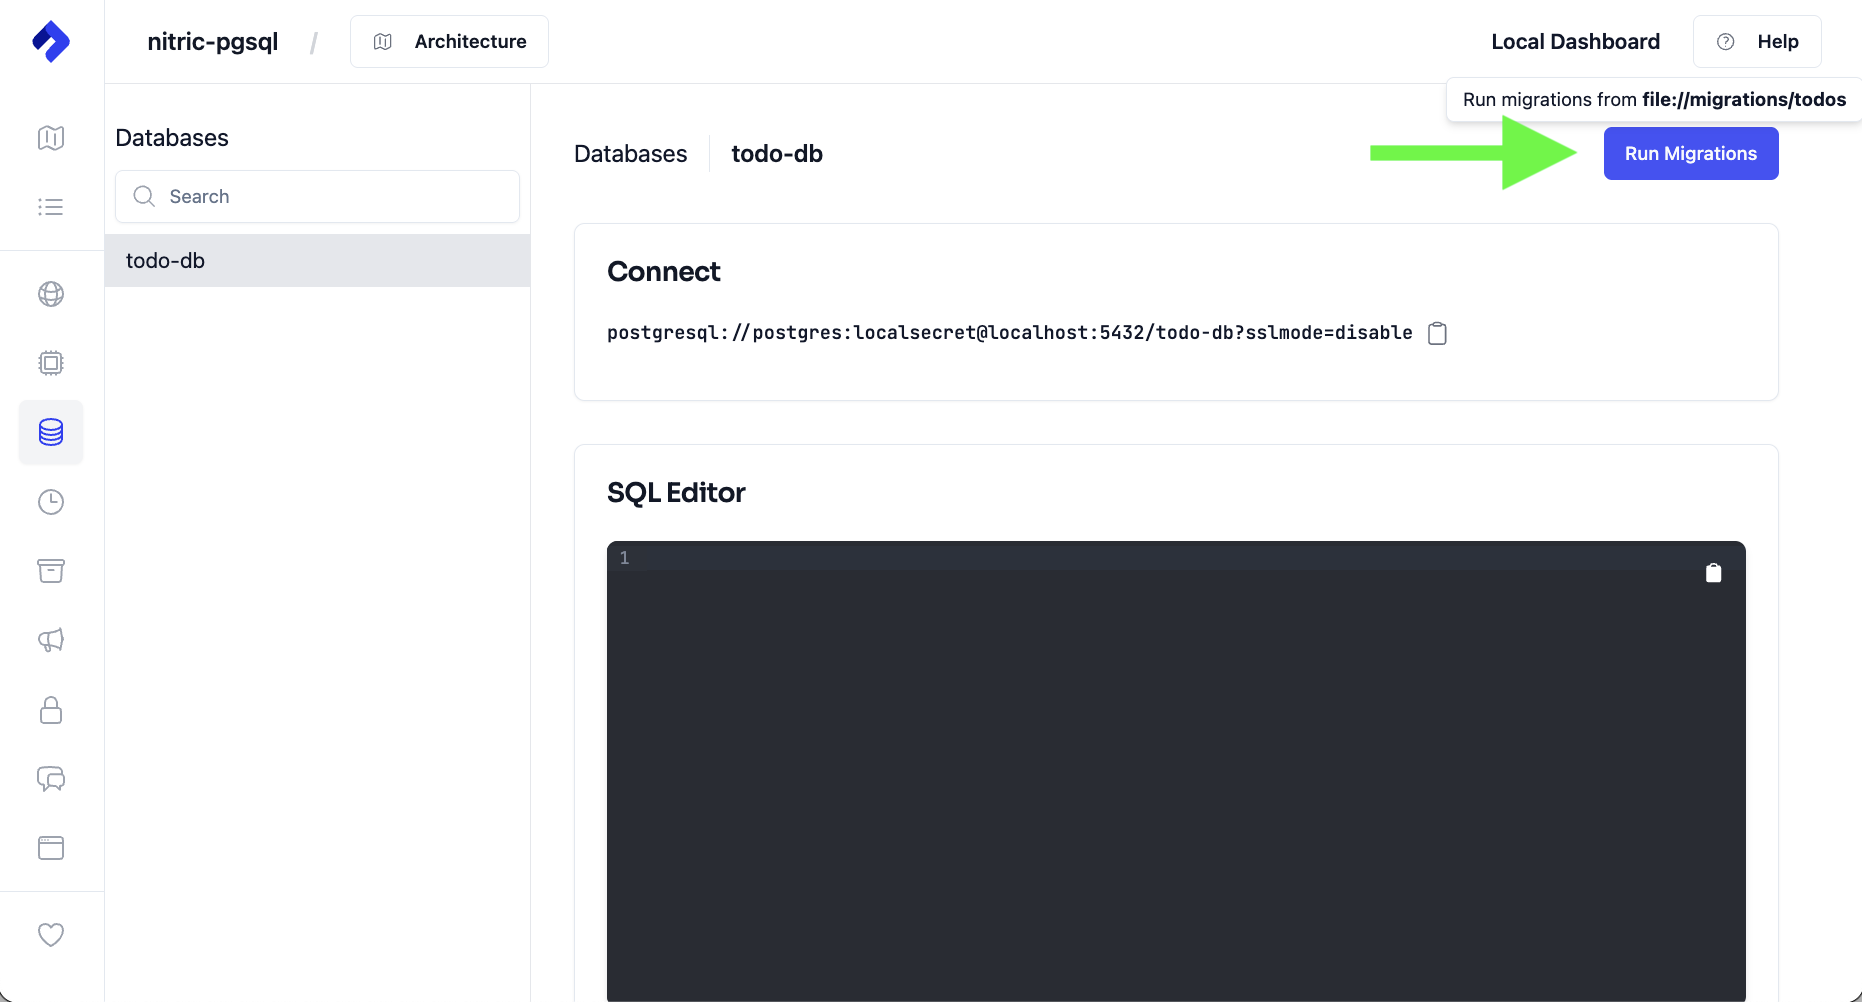
Using the dashboard, apply your migrations from the databases tab to initialize your local db.
Add some todos using the Nitric dashboard
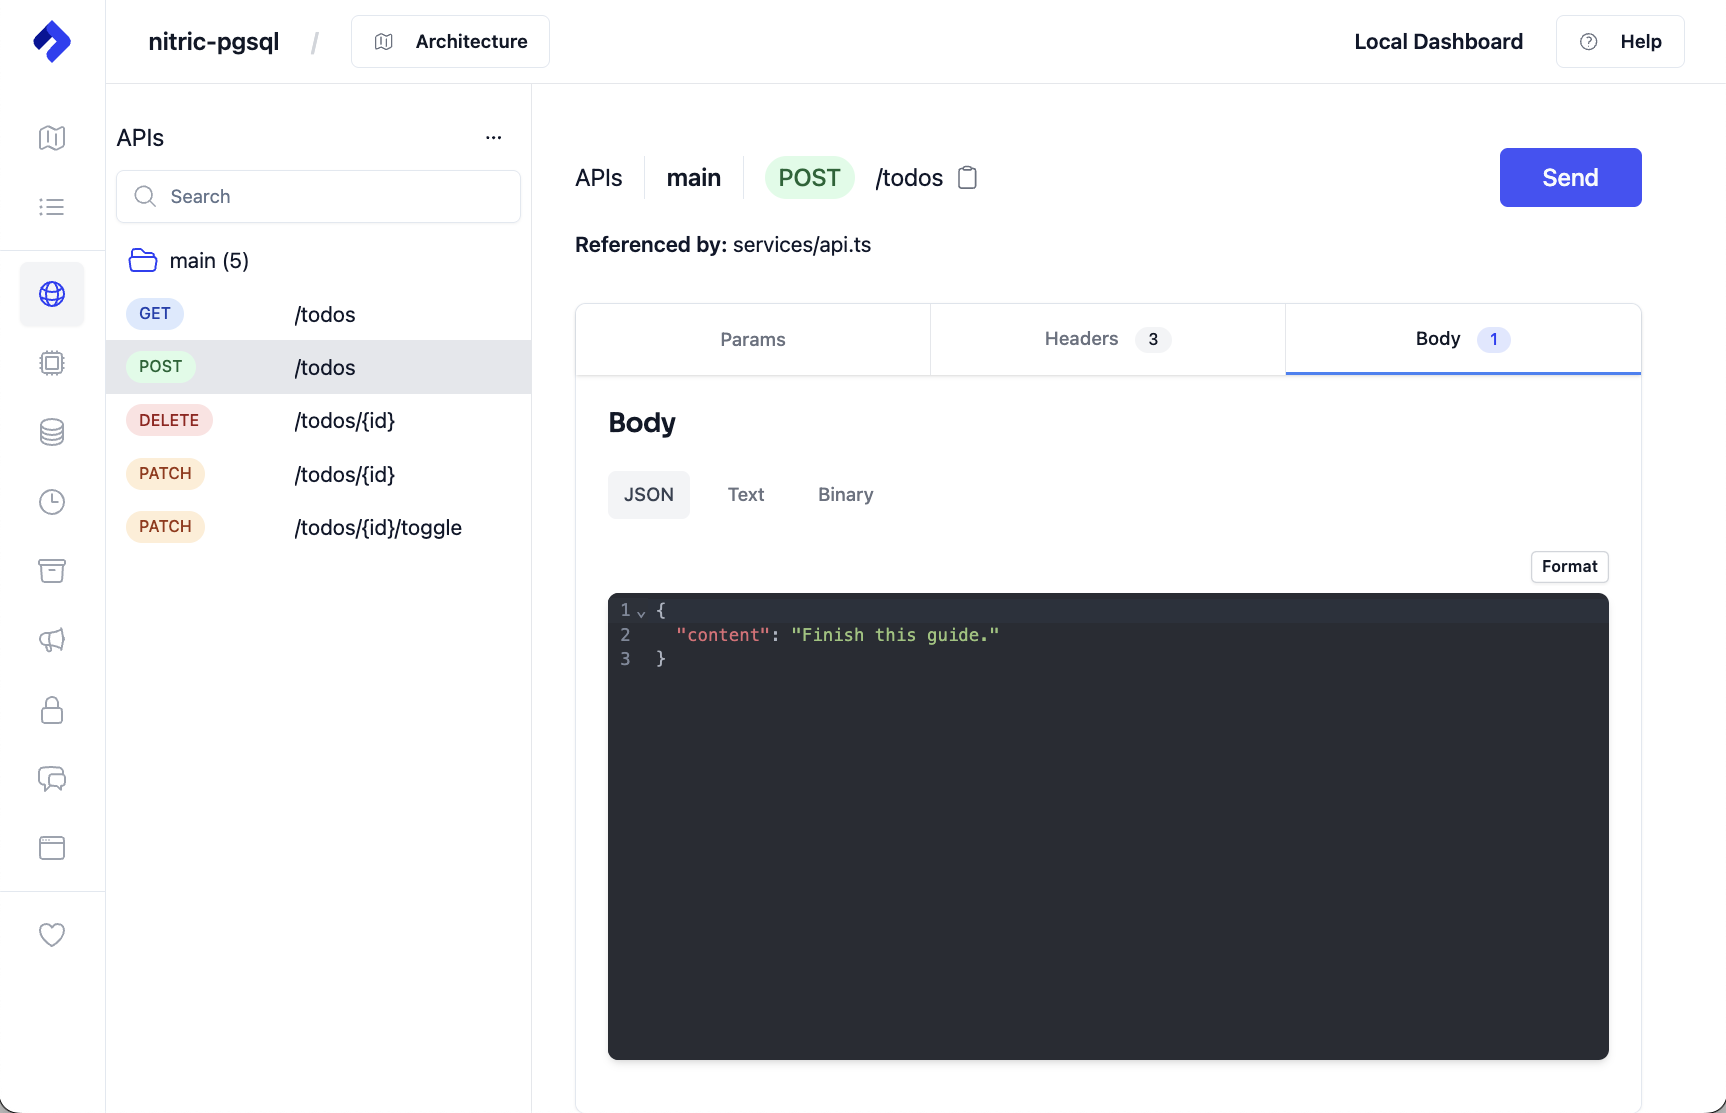
Open the local dashboard at localhost:49152, then navigate to the POST /todos endpoint and add some content to the body of the request, stating the content key and value of the todo task and click send.
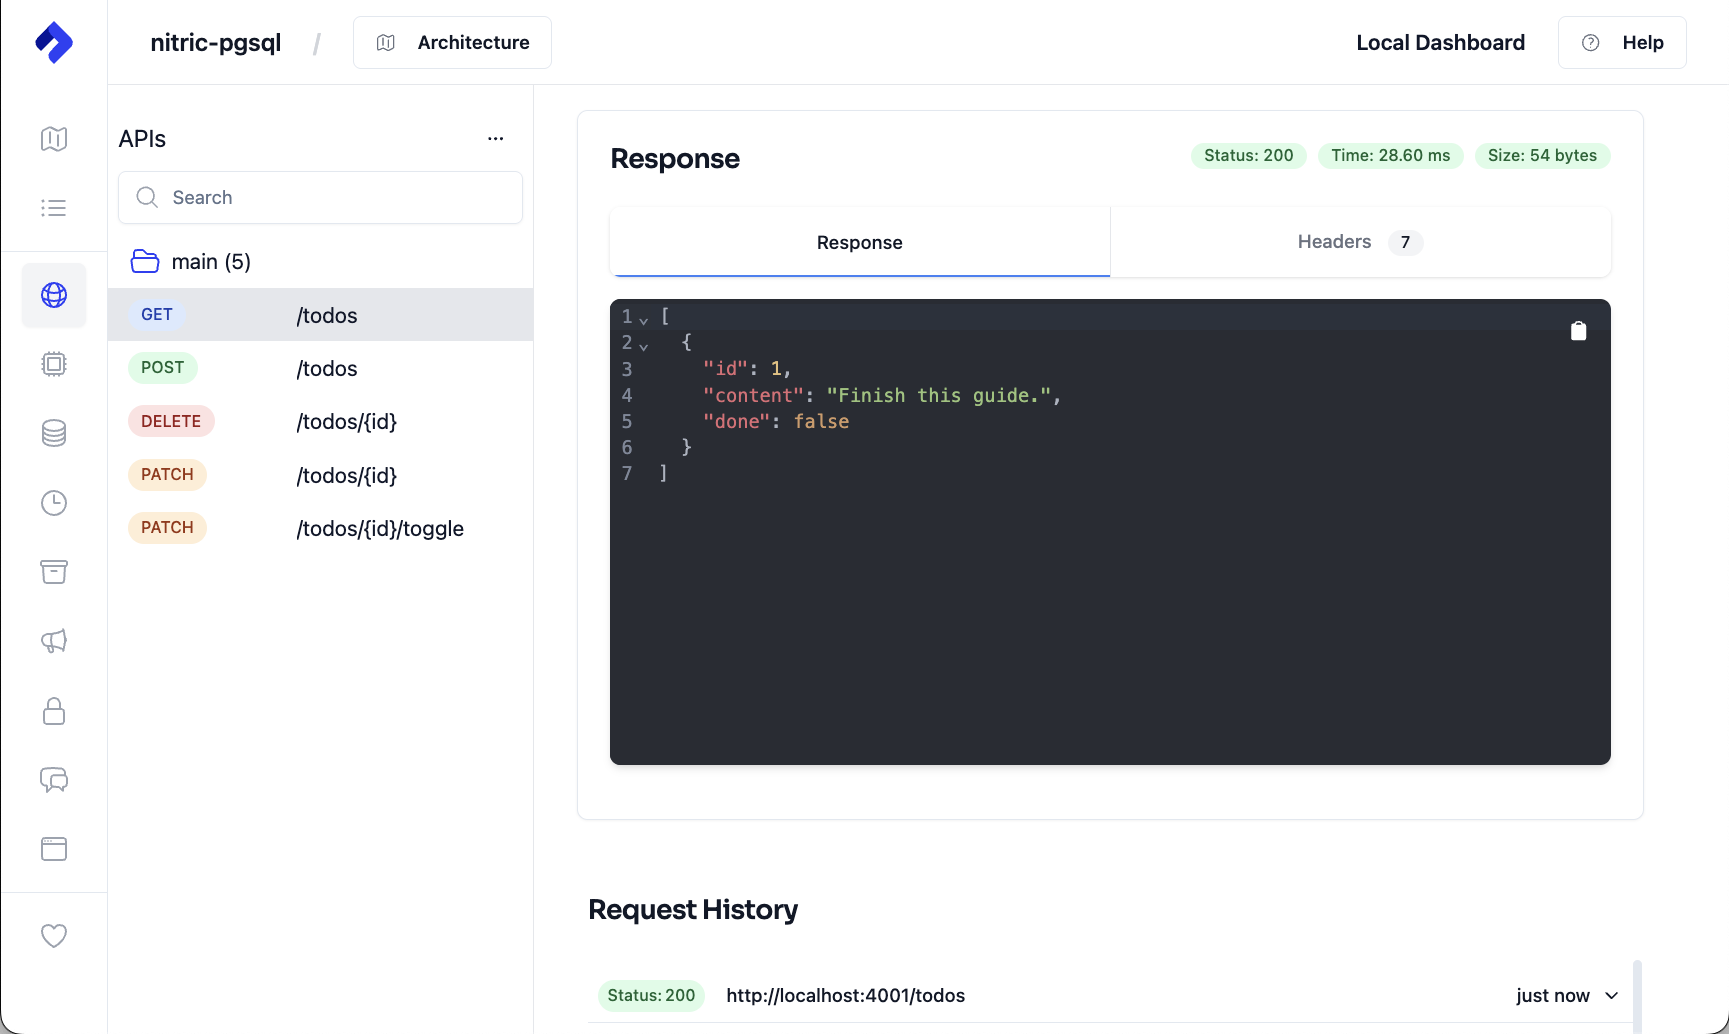
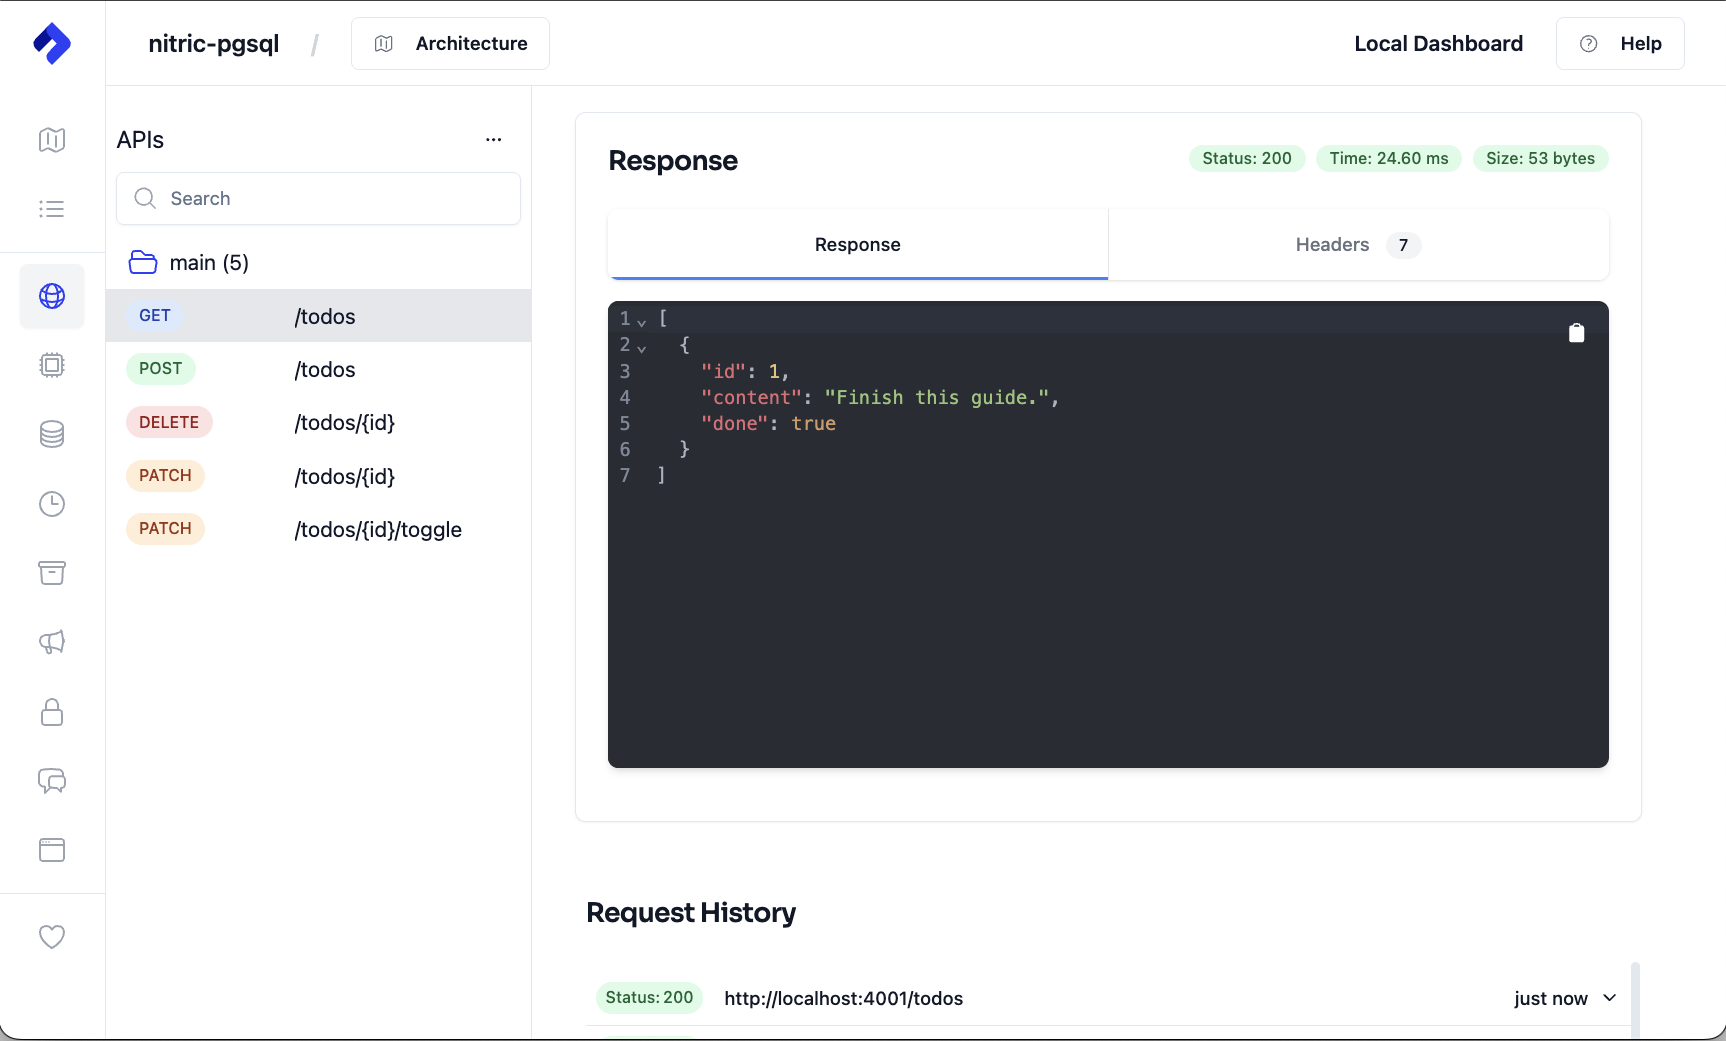
Let's check our todo got created by calling the GET /todos endpoint, which will list all todos.
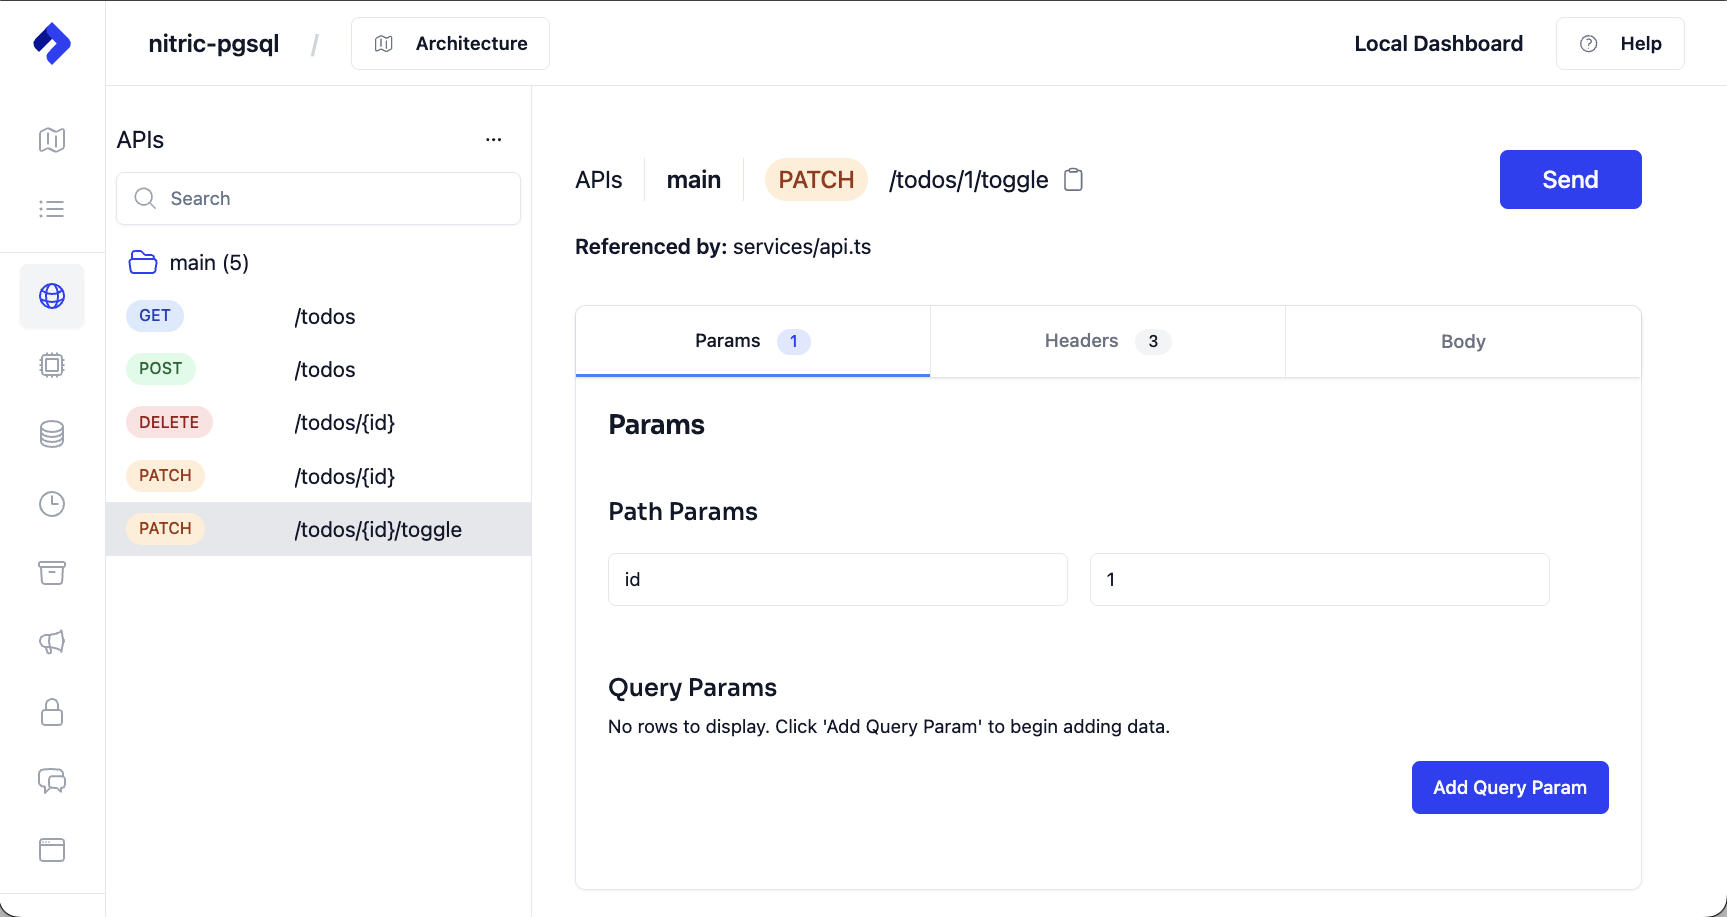
Let's toggle our todo as done, navigate to the PATCH /todos/{id}/toggle and enter the correct id to toggle.
Finally, let's check our todo got toggled to done by calling the GET /todos endpoint.
Feel free to test the other endpoints to update or delete the todo items.
Deploying to AWS
Create your stack
Create an AWS stack called aws-staging for your staging environment.
nitric stack new aws-staging aws
Inside the stack file, ensure you set your region.
provider: nitric/aws@latestregion: us-east-2
Deploy
Deploy to AWS using the nitric up command. Ensure you have set up your AWS credentials correctly.
nitric up
Tear down
To avoid unwanted costs of running your test app, you can tear down the stack using the nitric down command.
nitric down
Prefer to use an ORM? We also have these guides:
Have feedback on this page?
Open GitHub Issue