Terraform AWS Provider Overview
The officially supported Nitric Terraform AWS Provider.
provider: nitric/awstf@latest
The Nitric Terraform AWS Provider is currently in Preview. We recommend reviewing the generated Terraform before deploying to Production environments, or alternatively using the Pulumi AWS Providers.
Prerequisites
The Terraform CLI is required to deploy the resulting Terraform Stack that Nitric generates. You can find the installation instructions for Terraform in the Terraform documentation.
The provider is built with the Cloud Development Kit for Terraform (CDKTF). Since CDKTF relies on Node.js, you'll need to have Node.js installed, you can read about the full CDKTF prerequisites in the CDKTF documentation.
AWS Credentials
The Terraform CLI typically uses standard AWS credential settings to authenticate with AWS. If you've set credentials for the AWS CLI or an AWS SDK previously, these settings should work without modification.
If you're setting your credentials for the first time, there are several available methods. We recommend the standard AWS credentials file to get started.
AWS Credential File Setup
Create a new credentials files at one of these locations:
~/.aws/credentialson Linux, macOS, or UnixC:\Users\USERNAME\.aws\credentialson Windows
The file should contain the following:
[default]aws_access_key_id = your_access_key_idaws_secret_access_key = your_secret_access_key
To use a different AWS profile for your deployments, you can use the
AWS_PROFILE environment variable. If no profile is supplied, we will use the
[default] profile.
Replace your_access_key_id and your_secret_access_key with your own values.
You can create an Access Key by logging into the AWS console and navigating to:
Username Menu > Security credentials > Access keys > Create New Access Key
See AWS documentation for full details on credentials and configuration.
Locating deployed resources
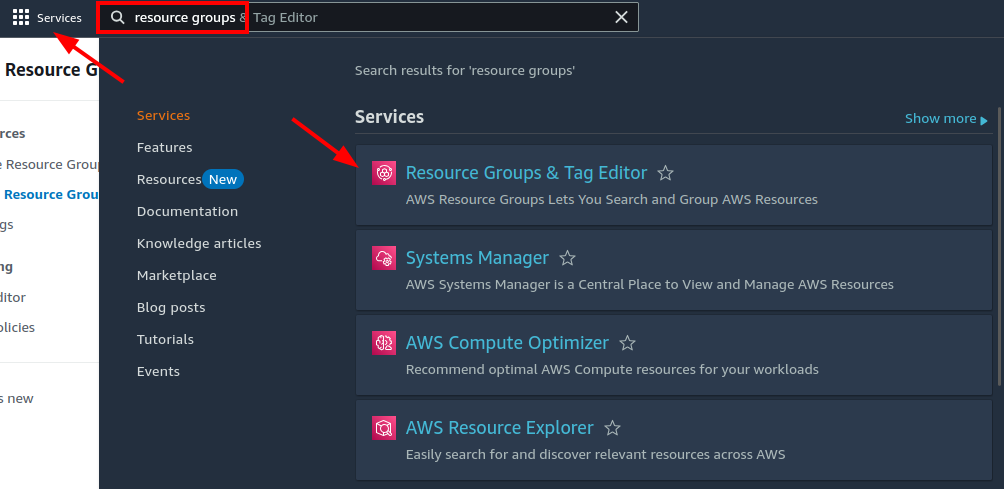
Nitric creates a resource tag manager group and tags all possible resources to be referenced by this group. You can locate resources in the console by going to the AWS Console
Next, navigate to the Resource Groups service:
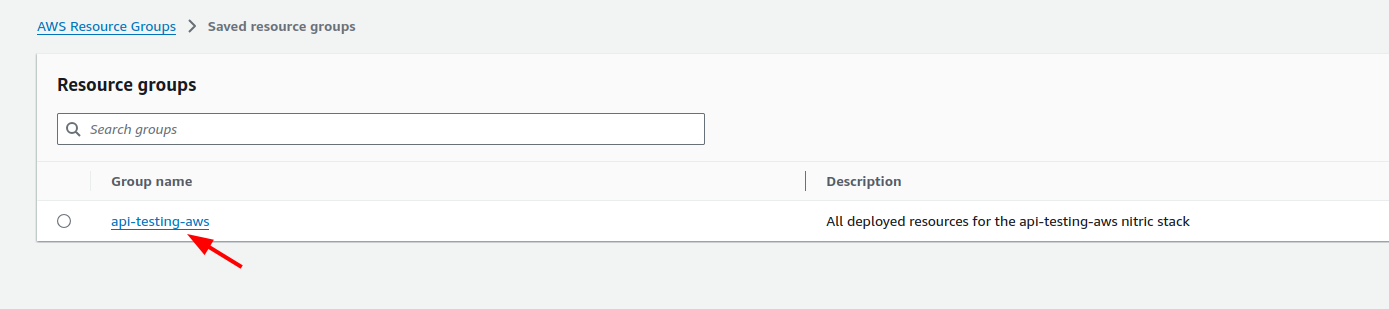
Find your stack's resource group in the list and click it:
Resource groups are conventionally named <project-name>-<stack-name>
In this example the project name is api-testing and the stack name is aws.
Importing Existing Resources
The Nitric team is working to expand the list of resources that can be imported. Currently, only the following resources are supported:
Currently, only resources in the same AWS account and region as the Nitric project are supported.
Secrets
To import a secret, you will need to know the secret's ARN. You can find the ARN of a secret in the AWS console or by using the AWS CLI.
First, add the secret to your project as you usually would if it wasn't imported. Then add the secret to the import section of your stack file. Here's an example of how to import a secret:
import { secret } from "@nitric/sdkconst mySecret = secret("credentials").allow("access");
import:secrets:credentials: arn:aws:secretsmanager:us-east-1:123456789012:secret:my-secret
Unlike some other imported resources, secret imports require the ARN to be used. Providing only the secret's name will be invalid.
Need to import another resource type or have another question? Chat with us on Discord or open an issue on GitHub.
Stack Configuration
# The provider to use and it's published version# See releases:# https://github.com/nitrictech/nitric/tagsprovider: nitric/awstf@latest# The target aws region to deploy to# See available regions:# https://docs.aws.amazon.com/general/latest/gr/lambda-service.htmlregion: my-aws-stack-region# Optional outdir# outdir: ./tf-output# Import existing AWS Resources# Currently only secrets are supportedimport:# A name ARN map of secrets, where the name matches the nitric name of the secret you would like to importsecrets:# In typescript this would import the provided secret reference for a secret declared as# const mySecret = secret('my-secret');my-secret: arn:aws:secretsmanager:us-east-1:123456789012:secret:my-secret# The timezone that deployed schedules will run with# Format is in tz identifiers:# https://en.wikipedia.org/wiki/List_of_tz_database_time_zonesschedule-timezone: Australia/Sydney # Available since v0.27.0# Apply configuration to nitric APIsapis:# The nitric name of the API to configuremy-api:# Array of domains to apply to the API# The domain or parent domain must have a hosted zone already in Route53domains:- api.example.com# Apply configuration for nitric websitescdn:# A valid domain or subdomain for the CloudFront Distribution to use for the deployed websites endpointdomain: cdn.example.com# Skip CDN cache invalidation during deployments (defaults to false)skip-cache-invalidation: true# Configure your deployed servicesconfig:# How services without a type will be deployeddefault:# configure a sample rate for telemetry (between 0 and 1) e.g. 0.5 is 50%telemetry: 0# configure services to deploy to AWS lambdalambda: # Available since v0.26.0# set the memory in MB# See lambda configuration docs here:# https://docs.aws.amazon.com/lambda/latest/dg/configuration-function-common.html#configuration-memory-consolememory: 128# set a timeout in seconds# See lambda timeout values here:# https://docs.aws.amazon.com/lambda/latest/dg/configuration-function-common.html#configuration-timeout-consoletimeout: 15# set the amount of ephemeral-storage in MB# For info on ephemeral-storage for AWS Lambda see:# https://docs.aws.amazon.com/lambda/latest/dg/configuration-ephemeral-storage.htmlephemeral-storage: 512# Additional deployment types# You can target these types by setting a `type` in your project configurationbig-service:telemetry: 0lambda:memory: 1024timeout: 60provisioned-concurrency: 1
Have feedback on this page?
Open GitHub Issue