Securing your API with Auth0
What we'll be doing
In this guide we'll use the Nitric Framework with an Auth0 application to build serverless functions and a secure API.
This example adds secure JWT authentication to an API allowing you to integrate it either with standalone API login, or to integrate it with a frontend application using the client's identity token.
Prerequisites
- Node.js
- The Nitric CLI
- An account with Auth0
Create an Auth0 API
We're assuming you're already using Auth0, but if not you can sign up for free.
Normally when authenticating a frontend application with Auth0 you will create a new Auth0 application that can be used to log into your app. These log ins will supply you with an Auth0 identity token that can be used to request access tokens used to consume your backend APIs.
For the purposes of this guide we are only securing a new API, so we only need to create a new API within Auth0.
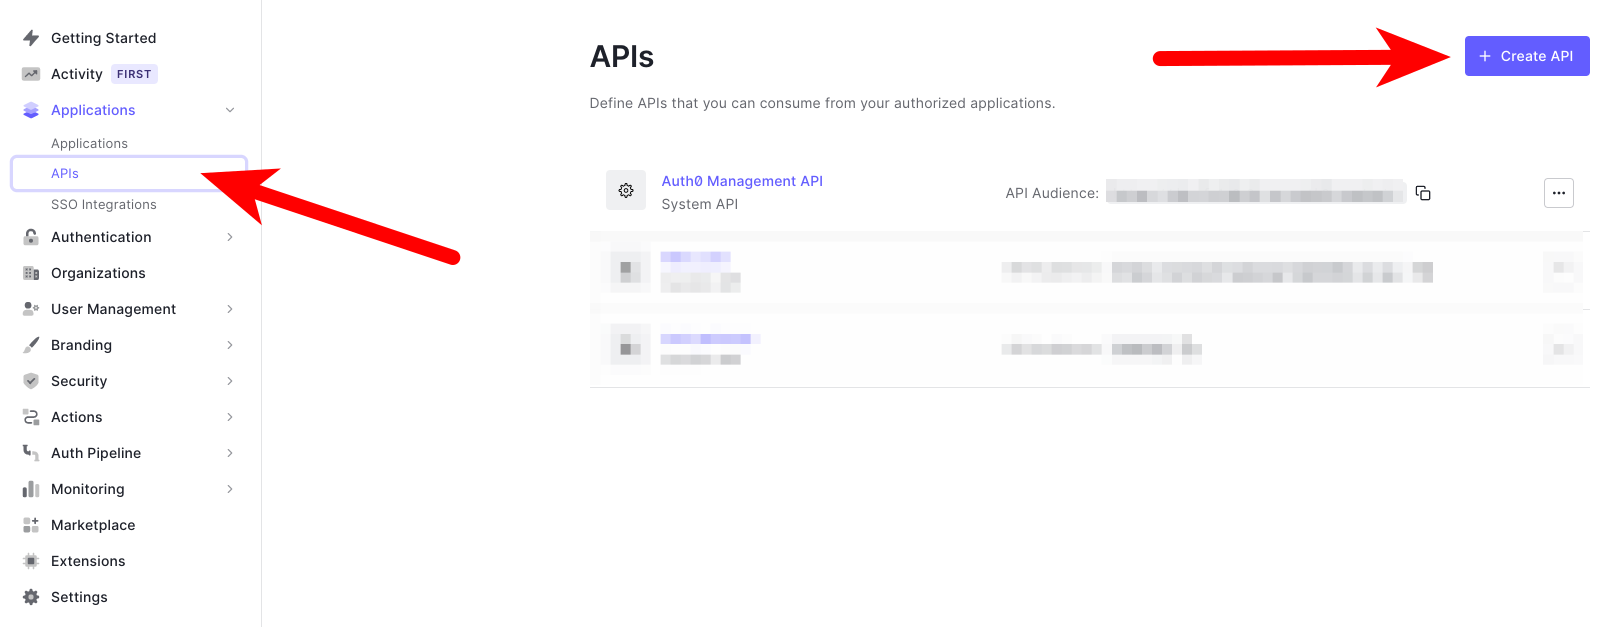
Log into Auth0 and create a new API. If you have an existing API you'd like to use, that's fine, just adapt the next steps to match your existing API.
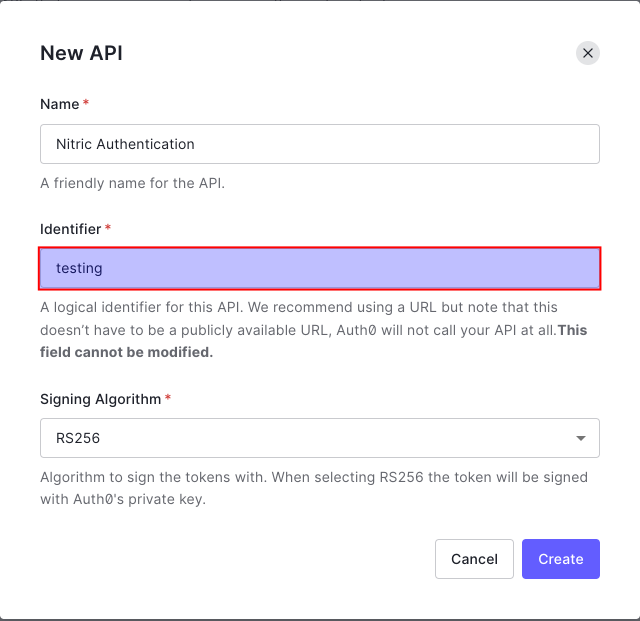
You can enter any identifier you want, this guide will continue using 'testing' in subsequent steps.
Configuring the Nitric API
Now we're ready to hook up our API for testing with our application. For this guide we'll create a new TypeScript application using nitric new, if you have an application already you want to use, just adapt the below steps to your application.
Before we start getting into the code we'll need a bit more information from Auth0.
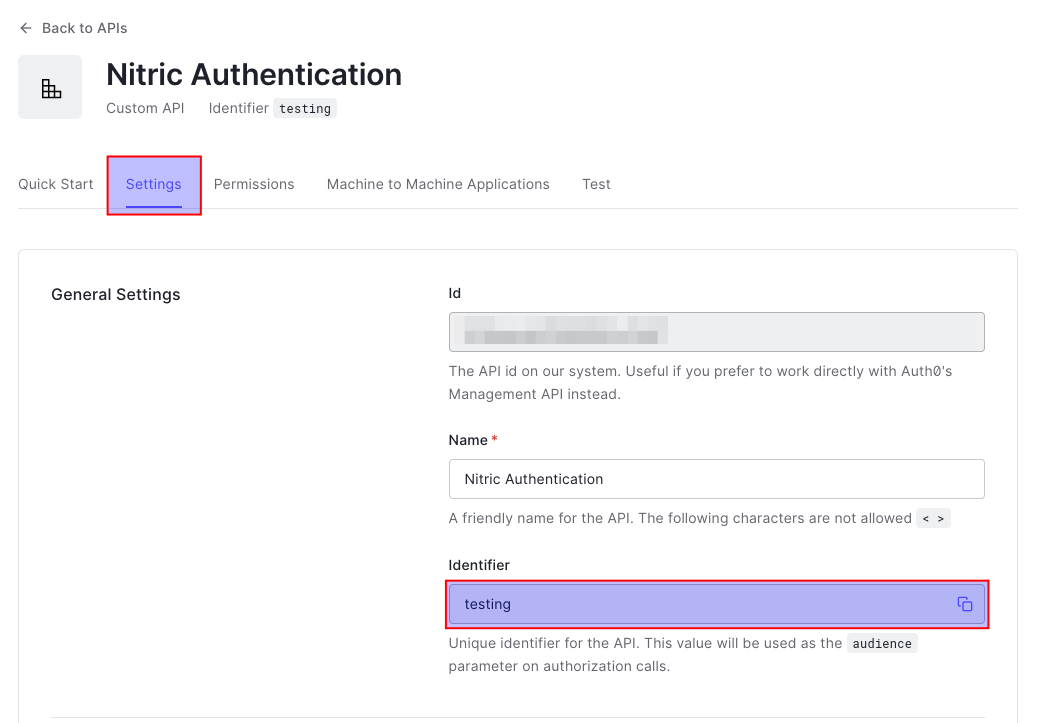
First we'll need the audience for our API, this can be found on the settings tab of your new API.
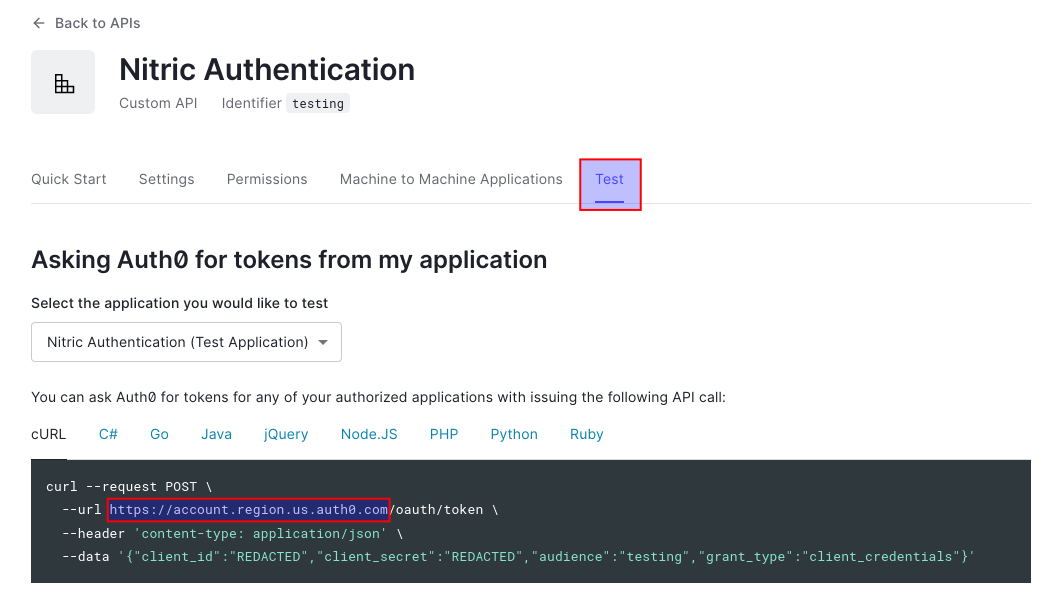
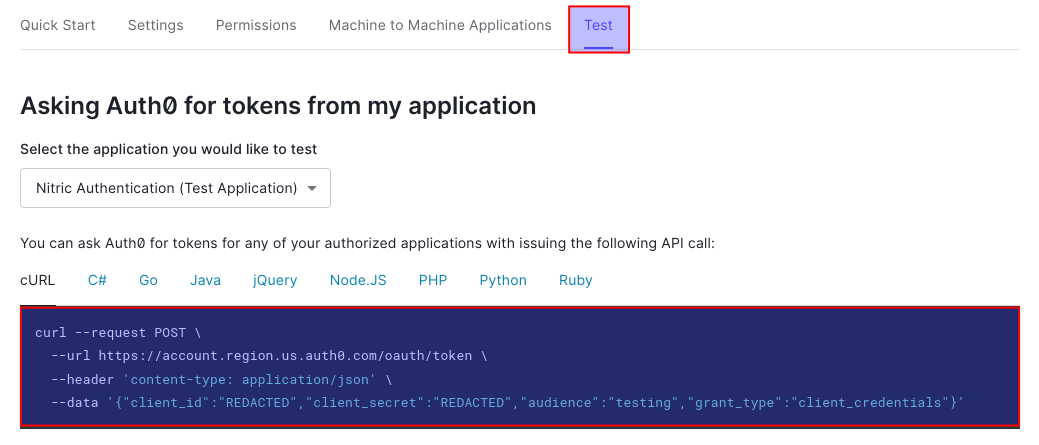
Second we'll get the issuer for our API, this will be our Auth0 environment endpoint. An easy way to see this is to navigate the Test tab of our API.
In our new Nitric service you will have the following in the api.ts file
import { api } from '@nitric/sdk'const mainApi = api('main')mainApi.get('/hello/:name', async (ctx) => {const { name } = ctx.req.paramsctx.res.body = `Hello ${name}`return ctx})
To secure our API we will need to import the jwt function from the Nitric SDK and configure our API gateway with the values we got from Auth0 in the above steps.
import { api, oidcRule } from '@nitric/sdk'// define security for this APIconst defaultSecurityRule = oidcRule({name: 'auth0',issuer:'https://your-auth0-app.region.auth0.com/.well-known/openid-configuration', // 👀 your issuer value goes here audience: "api://default",audiences: ['testing'], // 👀 your audience value goes here})const mainApi = api('main', {security: [defaultSecurityRule()],})mainApi.get('/hello/:name', async (ctx) => {const { name } = ctx.req.paramsctx.res.body = `Hello ${name}`return ctx})
Testing the Security Definition
To test our security we will need to deploy our application to a cloud that Nitric supports (security rules are currently not enforced for local development).
If you don't have a stack already defined we'll create one with nitric stack new.
Run nitric stack new and follow the prompts to create a new stack.
Configure your stack, then run nitric up to deploy your application.
We can check to see if our application is secure by calling it without an Authorization header
curl <INSERT_API_GATEWAY>/hello/world
This should return a 401 error.
To test your application, you can follow the instructions on the Test tab of your Auth0 API, to create a new JWT token to test with.
Once we have our token we can call our API.
curl -H "Authorization: Bearer <INSERT_TOKEN>" <INSERT_API_GATEWAY>/hello/world
Which should return Hello world.
And that's all it takes to secure your Nitric APIs with Auth0 🎉. For more detailed information on available options for securing your APIs check out our API docs.
Have feedback on this page?
Open GitHub Issue