Generate a report with Google Sheets and share it with Google Drive
What we'll be doing
In this tutorial, we'll learn how to integrate Nitric with some popular Google service apis. We'll create a scheduled service which will run on a daily basis to create and share a Google Sheets document with another user.
Prerequisites
- The Nitric CLI
- uv - for Python dependency management
- A Google Cloud account with Sheets and Drive APIs enabled.
- Credentials for a Google service account.
Project setup
First, we'll create a new nitric project and install the necessary Python packages.
nitric new reports py-starteruv add google-auth google-api-python-client
You can now delete all files in the services/ folder, we'll create new services in this guide.
Authenticate with Google Cloud APIs
Start by creating a new folder inside 'service' named 'helpers' and creating a blank __init__.py to identify it as a python package.
We'll begin coding in a new file services/helpers/google.py, creating a function that can authenticate with Google's API and ensure our application has the necessary permissions.
import google.authfrom googleapiclient.discovery import buildimport osSCOPES = ['https://www.googleapis.com/auth/spreadsheets', 'https://www.googleapis.com/auth/drive']def service_login():creds = Nonecredentials_path = os.getenv('GOOGLE_APPLICATION_CREDENTIALS')if credentials_path:creds, _ = google.auth.load_credentials_from_file(credentials_path, SCOPES)else:raise ValueError("GOOGLE_APPLICATION_CREDENTIALS is not set, failed to load credentials")return build('sheets', 'v4', credentials=creds), build('drive', 'v3', credentials=creds)
Create, populate and share a spreadsheet
Create a new sheet
def create_spreadsheet(title, sheets_service):body = {'properties': {'title': title}}spreadsheet = sheets_service.spreadsheets().create(body=body, fields='spreadsheetId').execute()return spreadsheet.get('spreadsheetId')
Generate sample data for the report
import randomimport datetimedef generate_dummy_data(rows=10):data = [['Name', 'Date', 'Value']]names = ['Alice', 'Bob', 'Charlie', 'Diana', 'Evan']for _ in range(rows):name = random.choice(names)date = (datetime.date.today() - datetime.timedelta(days=random.randint(0, 365))).isoformat()value = random.randint(100, 1000)data.append([name, date, value])return data
Insert the generated data into the spreadsheet
def insert_data_into_spreadsheet(spreadsheet_id, data, sheets_service):range_name = 'A1'body = {'values': data}result = sheets_service.spreadsheets().values().update(spreadsheetId=spreadsheet_id, range=range_name,valueInputOption='RAW', body=body).execute()print(f"{result.get('updatedCells')} cells updated.")
Share the generated spreadsheet with another account
def share_spreadsheet(spreadsheet_id, email_address, drive_service):drive_service.permissions().create(fileId=spreadsheet_id,body={'type': 'user', 'role': 'writer', 'emailAddress': email_address},fields='id').execute()
Daily report schedule
Next we'll pull it all together in our scheduled service, which will run daily and send an invitation to the specified user.
Create a file named report.py in the services directory, where you'll implement your scheduled task service.
Nitric allows you to set schedules using simple expressions e.g. 7 days, you
can also use cron expressions for more complicated
requirements.
import osfrom nitric.resources import schedulefrom nitric.application import Nitricfrom helpers import create_spreadsheet, generate_dummy_data, insert_data_into_spreadsheet, service_login, share_spreadsheetreport_schedule = schedule('run-a-report')@report_schedule.every('1 days')async def daily_report(ctx):sheets_service, drive_service = service_login()spreadsheet_id = create_spreadsheet("Daily Report", sheets_service)dummy_data = generate_dummy_data(rows=20)insert_data_into_spreadsheet(spreadsheet_id, dummy_data, sheets_service)share_spreadsheet(spreadsheet_id, os.getenv('ADMIN_EMAIL'), drive_service)Nitric.run()
Creating your credentials file in the Google Cloud Console
- Login into Google Cloud and create a new project.
- Ensure the Google Sheets and Drive APIs are enabled for your project.
- Navigate to "IAM & Admin" > "Service Accounts". Click "Create Service Account", enter the account details, and confirm by clicking "Create".
- Inside the service account details, go to the "Keys" section. Select "Add Key" > "Create new key", choose "JSON", and click "Create" to download the credentials file.
Environment Variables
We can now set environment variables with the values needed for the scheduled reporting to run. Create a file named .env in the root of your project and set the variables below, substituting the correct values for your setup.
GOOGLE_APPLICATION_CREDENTIALS=/path/to/your/service-account-file.jsonADMIN_EMAIL=admin@example.com
Ok, let's run this thing!
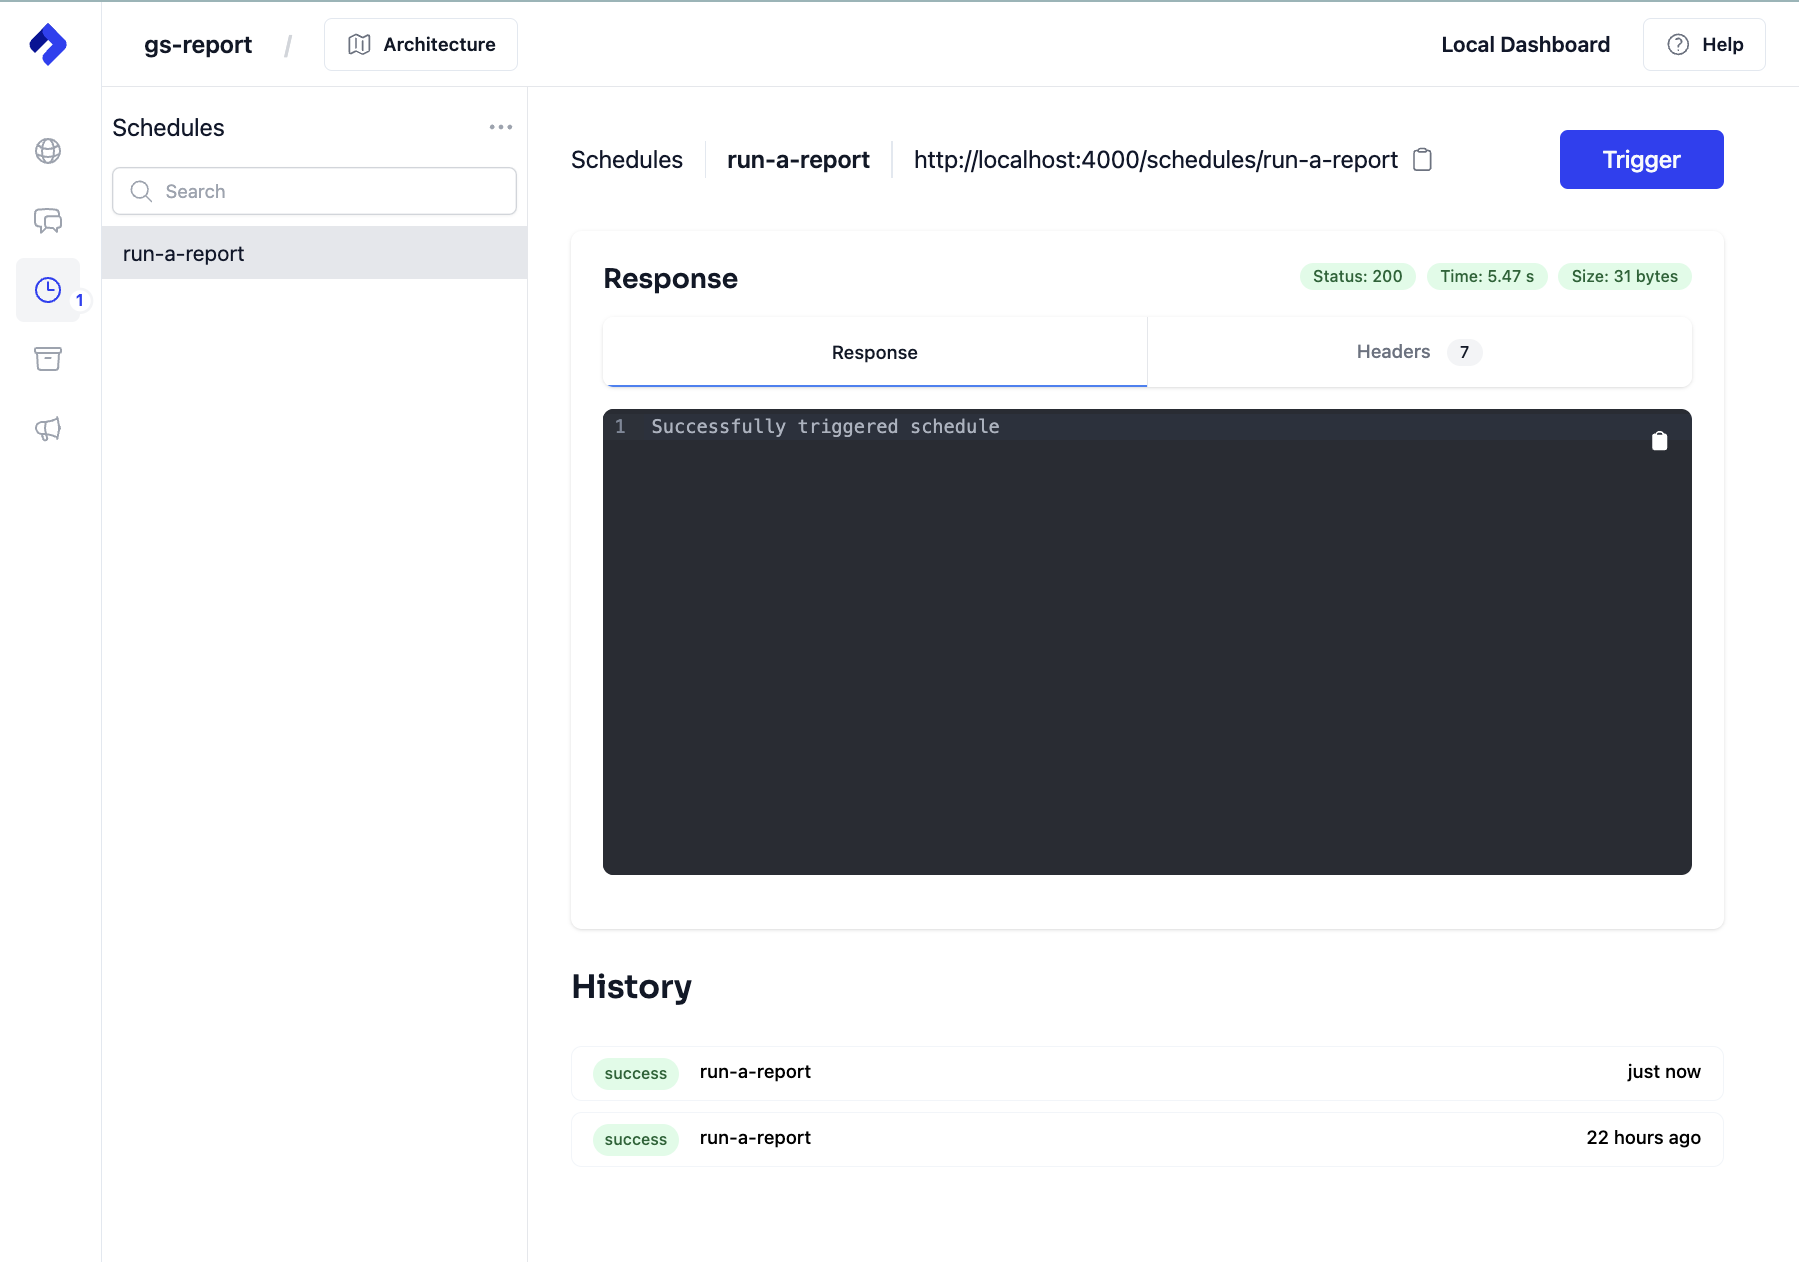
Use the Nitric Dashboard to trigger the task immediately, rather than waiting for the scheduled frequency.
Start your project and the Nitric server to emulate cloud services:
nitric start
Deploy to the cloud
At this point, you can deploy what you've built to any of the supported cloud providers. In this example we'll deploy to AWS. Start by setting up your credentials and configuration for the nitric/aws provider.
Next, we'll need to create a stack file (deployment target). A stack is a deployed instance of an application. You might want separate stacks for each environment, such as stacks for dev, test, and prod. For now, let's start by creating a file for the dev stack.
The stack new command below will create a stack named dev that uses the aws provider.
nitric stack new dev aws
Edit the stack file nitric.dev.yaml and set your preferred AWS region, for example us-east-1.
provider: nitric/aws@latestregion: us-east-1
You are responsible for staying within the limits of the free tier or any costs associated with deployment.
Let's try deploying the stack with the up command:
nitric up
When the deployment is complete, go to the relevant cloud console and you'll be able to see and interact with your application.
To tear down your application from the cloud, use the down command:
nitric down
Have feedback on this page?
Open GitHub Issue