Building AI Workflows: Combining LLMs and Voice Models - Part 1
In this guide we'll build a fully autonomous AI podcast, combining an LLM for script writing and a text-to-speech model to produce the audio content. By the end of this guide we'll be able to produce podcast style audio content from simple text prompts like "a 10 minute podcast about [add your topic here]".
In this first part we'll focus on generating the audio content, here's a sample of what we'll be able to produce:
Obviously, that example is a bit tongue-in-cheek, but the same features and techniques can be used to easily generate any number of outputs depending on your choice of models and how they're combined.
In this first part we'll using the suno/bark model from Hugging Face to generate the audio content. In part two we'll look at adding an LLM agent to our project to automatically generate scripts for our podcasts from small prompts.
Prerequisites
- uv - for Python dependency management
- The Nitric CLI
- (optional) An AWS account
Getting started
We'll start by creating a new project for our AI podcast using Nitric's python starter template.
nitric new ai-podcast py-startercd ai-podcast
Next, let's install our base dependencies, then add the extra dependencies we need specifically for this project including the transformers library from Hugging Face.
# Install the base dependenciesuv sync# Add hugginface hub dependenciesuv add huggingface-hub# Add the extra optional ml dependenciesuv add torch transformers scipy --optional ml
We add the extra dependencies to the 'ml' optional dependencies to keep them separate since they can be quite large. This lets us just install them in the containers that need them.
Designing the project
As you may know, Nitric helps with both cloud resource creation and interaction. We'll use Nitric to define the cloud resources our project needs. This includes an API to trigger new jobs, buckets for storing models and audio output, and the setup of our AI workloads to run as batch jobs.
To achieve this let's create a new python module which defines the resources for this project. We'll create this as common/resources.py in our project.
mkdir commontouch common/resources.py
from nitric.resources import api, bucket, job, topicimport osimport tempfile# Our main API for submitting audio generation jobsmain_api = api("main")# A job for generating our audio contentgen_audio_job = job("audio")# A bucket for storing output audio clipsclips_bucket = bucket("clips")# And another bucket for storing our modelsmodels_bucket = bucket("models")# Many cloud API Gateways impose hard response time limits on synchronous requests.# To avoid these limits, we can use a Pub/Sub topic to trigger asynchronous processing.download_audio_model_topic = topic("download-audio-model")model_dir = os.path.join(tempfile.gettempdir(), "ai-podcast", ".model")cache_dir = os.path.join(tempfile.gettempdir(), "ai-podcast", ".cache")zip_path = os.path.join(tempfile.gettempdir(), "ai-podcast", "model.zip")
We'll also need an __init__.py file in the common directory to make it a package.
touch common/__init__.py
Create the audio generation job
Next we'll create the beginnings of our audio generation job. First, we'll create a new directory for our batch services and create a new file for our audio generation job.
mkdir batchestouch batches/podcast.py
Then we'll define our audio generation job in batches/podcast.py.
from common.resources import gen_audio_job, clips_bucketfrom nitric.context import JobContextfrom nitric.application import Nitricfrom transformers import AutoProcessor, BarkModelimport scipyimport ioimport torchimport numpy as npimport requestsclips = clips_bucket.allow("write")# This defines the Job Handler that will process all audio generation jobs# using the job definition we created in the resources module@gen_audio_job(cpus=4, memory=12000, gpus=1)async def do_generate_audio(ctx: JobContext):# The name of the file to save the audio tofile = ctx.req.data["file"]# The text to convert to audiotext: str = ctx.req.data["text"]voice_preset: str = ctx.req.data["preset"]print("Loading model")model = BarkModel.from_pretrained("suno/bark")processor = AutoProcessor.from_pretrained("suno/bark")print("Model loaded")# Split the text by sentences and chain the audio clips together# We do this because the model can only reliably generate a small amount of audio at a timesentences = text.split(".")sentences = [sentence for sentence in sentences if sentence.strip() != ""]audio_arrays = []# generate an audio clip for each sentencefor index, sentence in enumerate(sentences):# "..." inserts pauses between sentences to prevent clips from running togetherinputs = processor(f"{sentence}...", voice_preset=voice_preset)# Move the inputs and model to the GPU if availableif torch.cuda.is_available():inputs.to("cuda")model.to("cuda")else:print("CUDA unavailable, defaulting to CPU. This may take a while.")print(f"Generating clip {index + 1}/{len(sentences)}")audio_array = model.generate(**inputs, pad_token_id=0)audio_array = audio_array.cpu().numpy().squeeze()audio_arrays.append(audio_array)# Concatenate the audio clips togetherfinal_array = np.concatenate(audio_arrays)buffer = io.BytesIO()print("Encoding clip")sample_rate = model.generation_config.sample_ratescipy.io.wavfile.write(buffer, rate=sample_rate, data=final_array)print("Storing the audio to the clips bucket")upload_url = await clips.file(f'{file}.wav').upload_url()requests.put(upload_url, data=buffer.getvalue(), headers={"Content-Type": "audio/wav"}, timeout=600)print("Done!")Nitric.run()
Create the HTTP API
Ok, now that we have our job defined we need a way to trigger it. We'll create an API that lets us submit text to be converted to audio, using the job we just defined.
In the existing services/api.py file, overwrite the contents with the following.
from common.resources import main_api, gen_audio_jobfrom nitric.application import Nitricfrom nitric.context import HttpContext# Give this service permission to submit tasks to the gen_audio_jobgen_audio = gen_audio_job.allow("submit")# See the list of available voice presets at https://suno-ai.notion.site/8b8e8749ed514b0cbf3f699013548683?v=bc67cff786b04b50b3ceb756fd05f68cdefault_voice_preset = "v2/en_speaker_6"# Generate a text-to-speech audio clip@main_api.post("/audio/:filename")async def submit_auto(ctx: HttpContext):name = ctx.req.params["filename"]preset = ctx.req.query.get("preset", default_voice_preset)if isinstance(preset, list):preset = preset[0]body = ctx.req.dataif body is None:ctx.res.status = 400return# Submit the audio generation job, this will run the job we defined as an async taskawait gen_audio.submit({"file": name, "text": body.decode('utf-8'), "preset": preset})Nitric.run()
Update the nitric.yaml
Finally, let's update the nitric.yaml to include the batch service we created and add the preview flag for batch.
name: ai-podcastservices:- match: services/*.pyruntime: pythonstart: uv run watchmedo auto-restart -p *.py --no-restart-on-command-exit -R uv run $SERVICE_PATHbatch-services:- match: batches/*.pyruntime: pythonstart: uv run watchmedo auto-restart -p *.py --no-restart-on-command-exit -R uv run $SERVICE_PATHruntimes:python:dockerfile: ./python.dockerfilepreview:- batch-services
Running the project locally
Now that we have the basic structure of our project set up, we can test it locally.
nitric start
Once its up and running we can test our API with any HTTP Client:
curl -X POST http://localhost:4001/audio/test -d "Okay this is cool, but let's wait and see what comes next"
If port 4001 is already in use on your machine the port will be different, e.g. 4002. You can find the port in the terminal output when you start the project.
Alternatively, you can use the nitric dashboard to submit the same text.
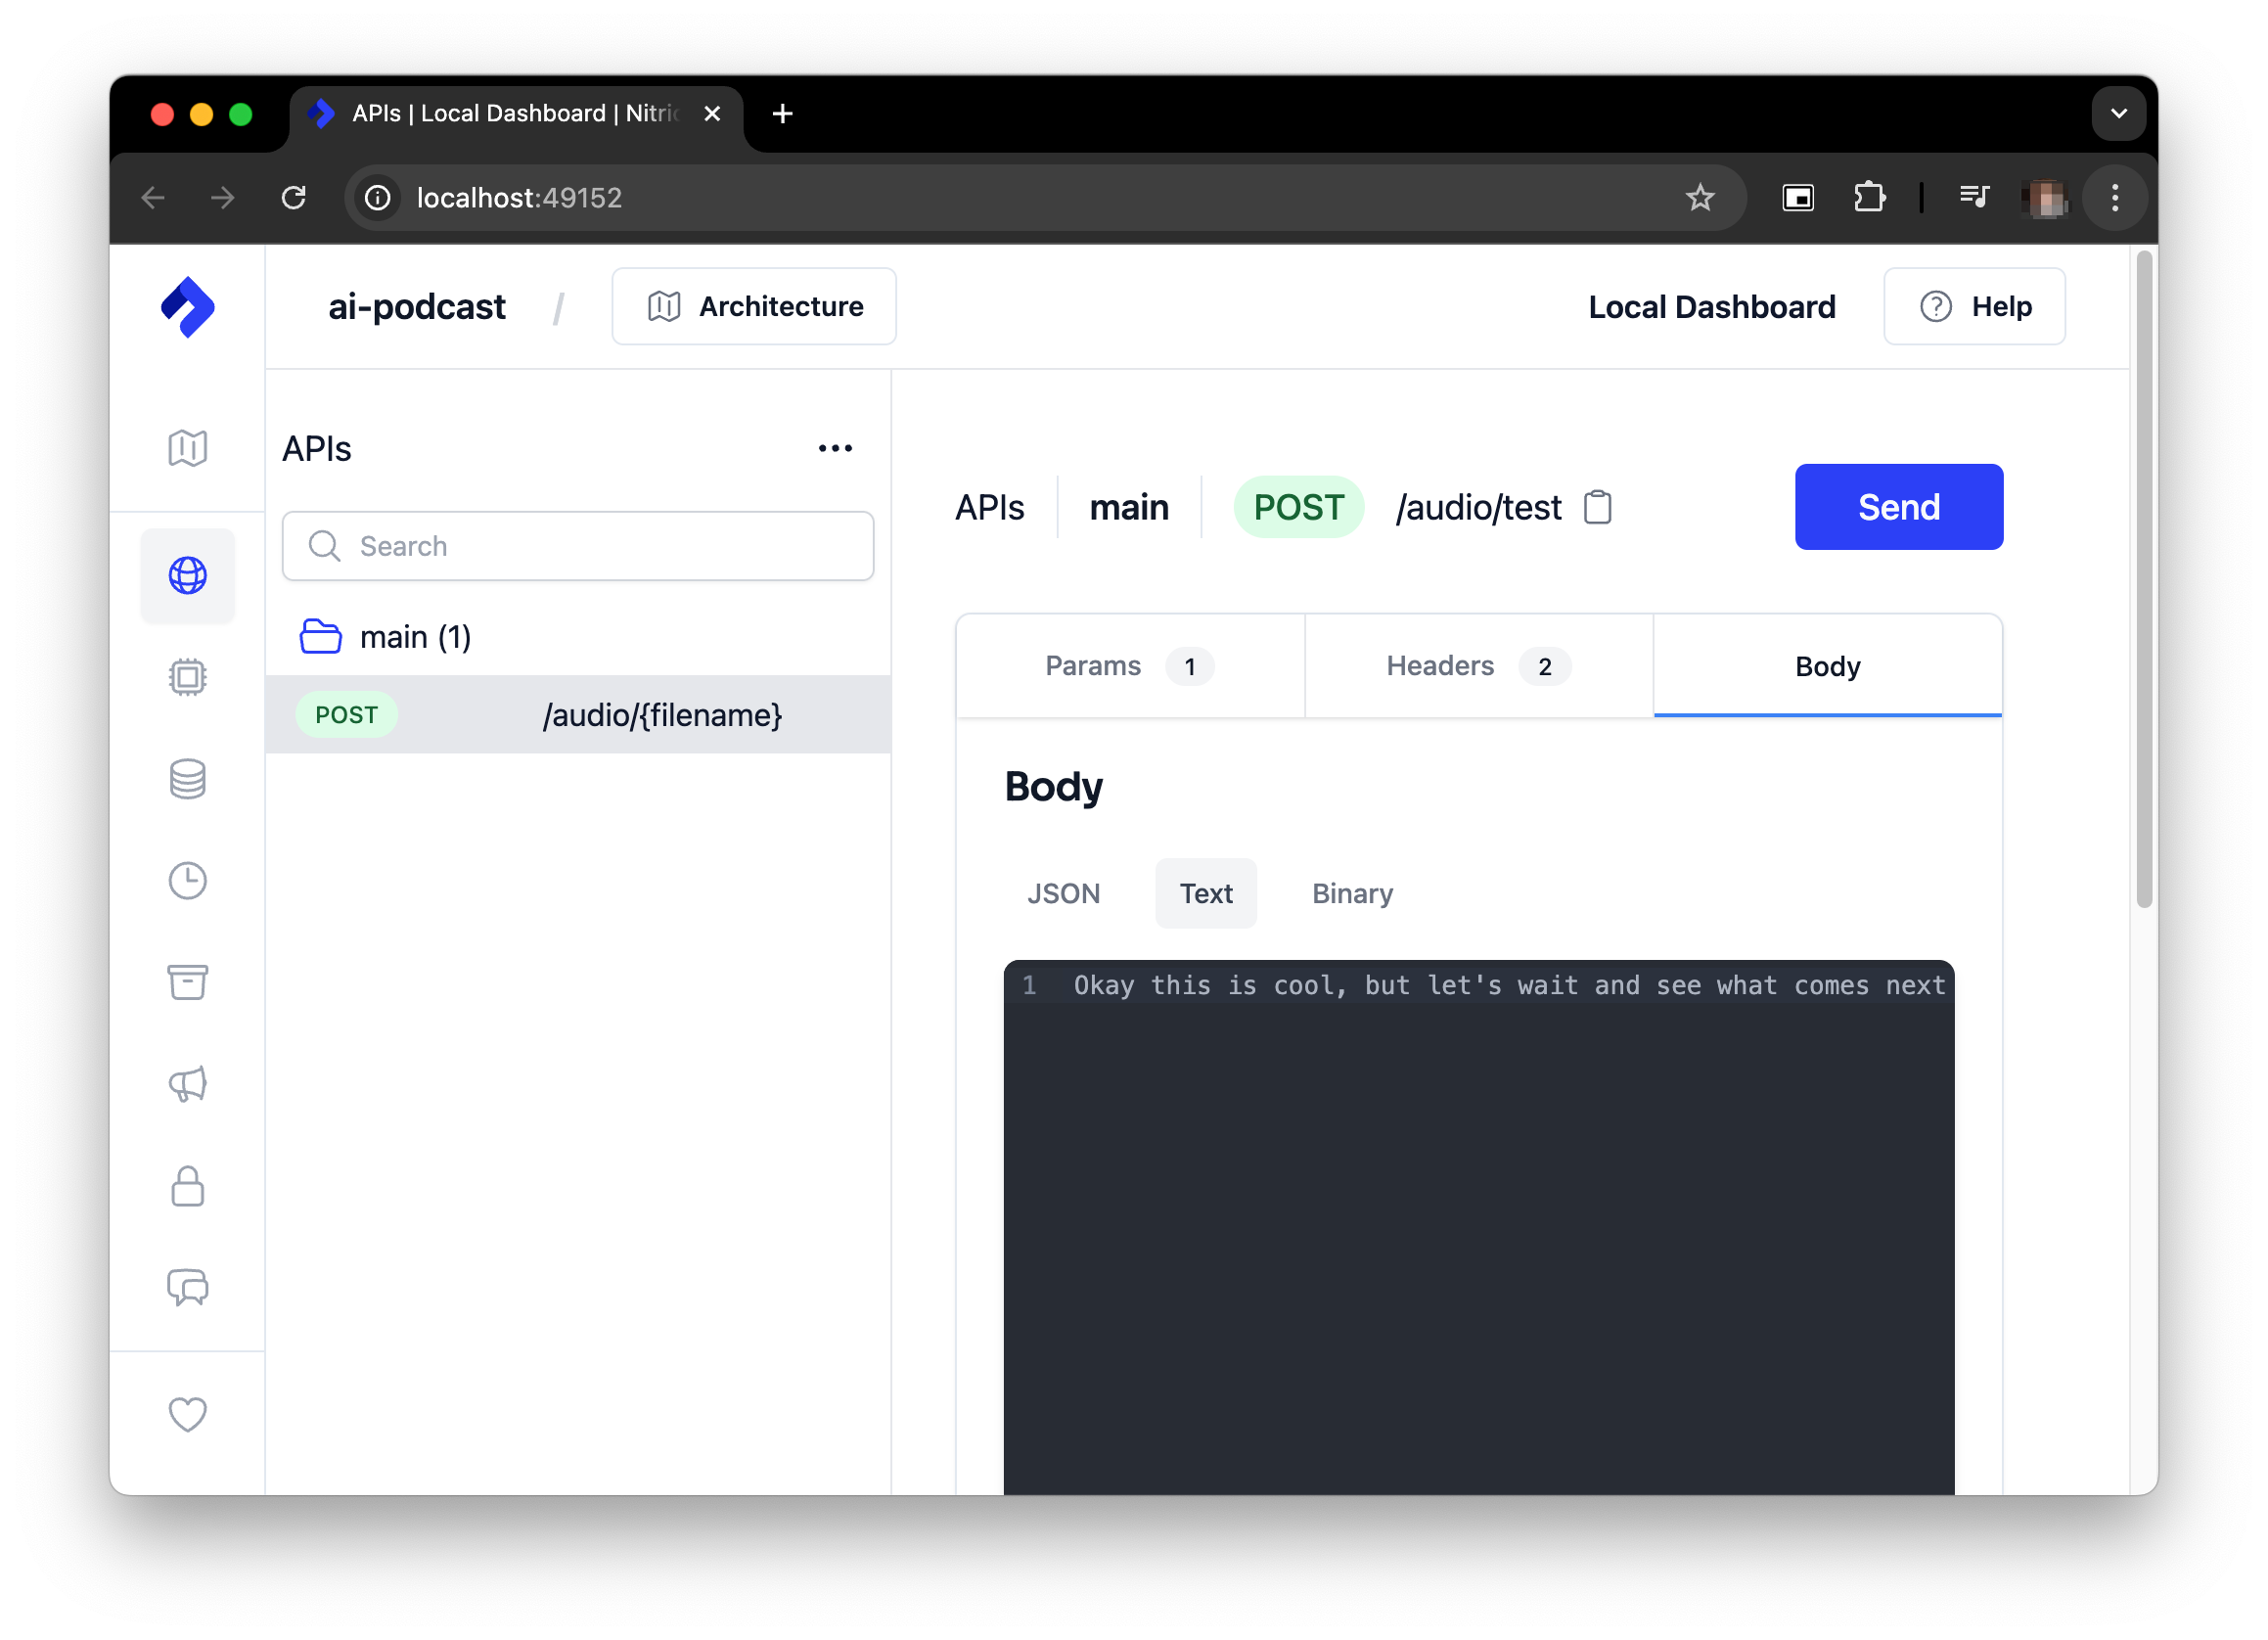
If you're running without a GPU it can take some time for the audio content to generate, so keep the text input short to start with.
Watch the logs in the terminal where you started the project to see the progress of the audio generation. When it's complete you'll can access it from the clips bucket using the local Nitric Dashboard e.g. http://localhost:49152/storage/.
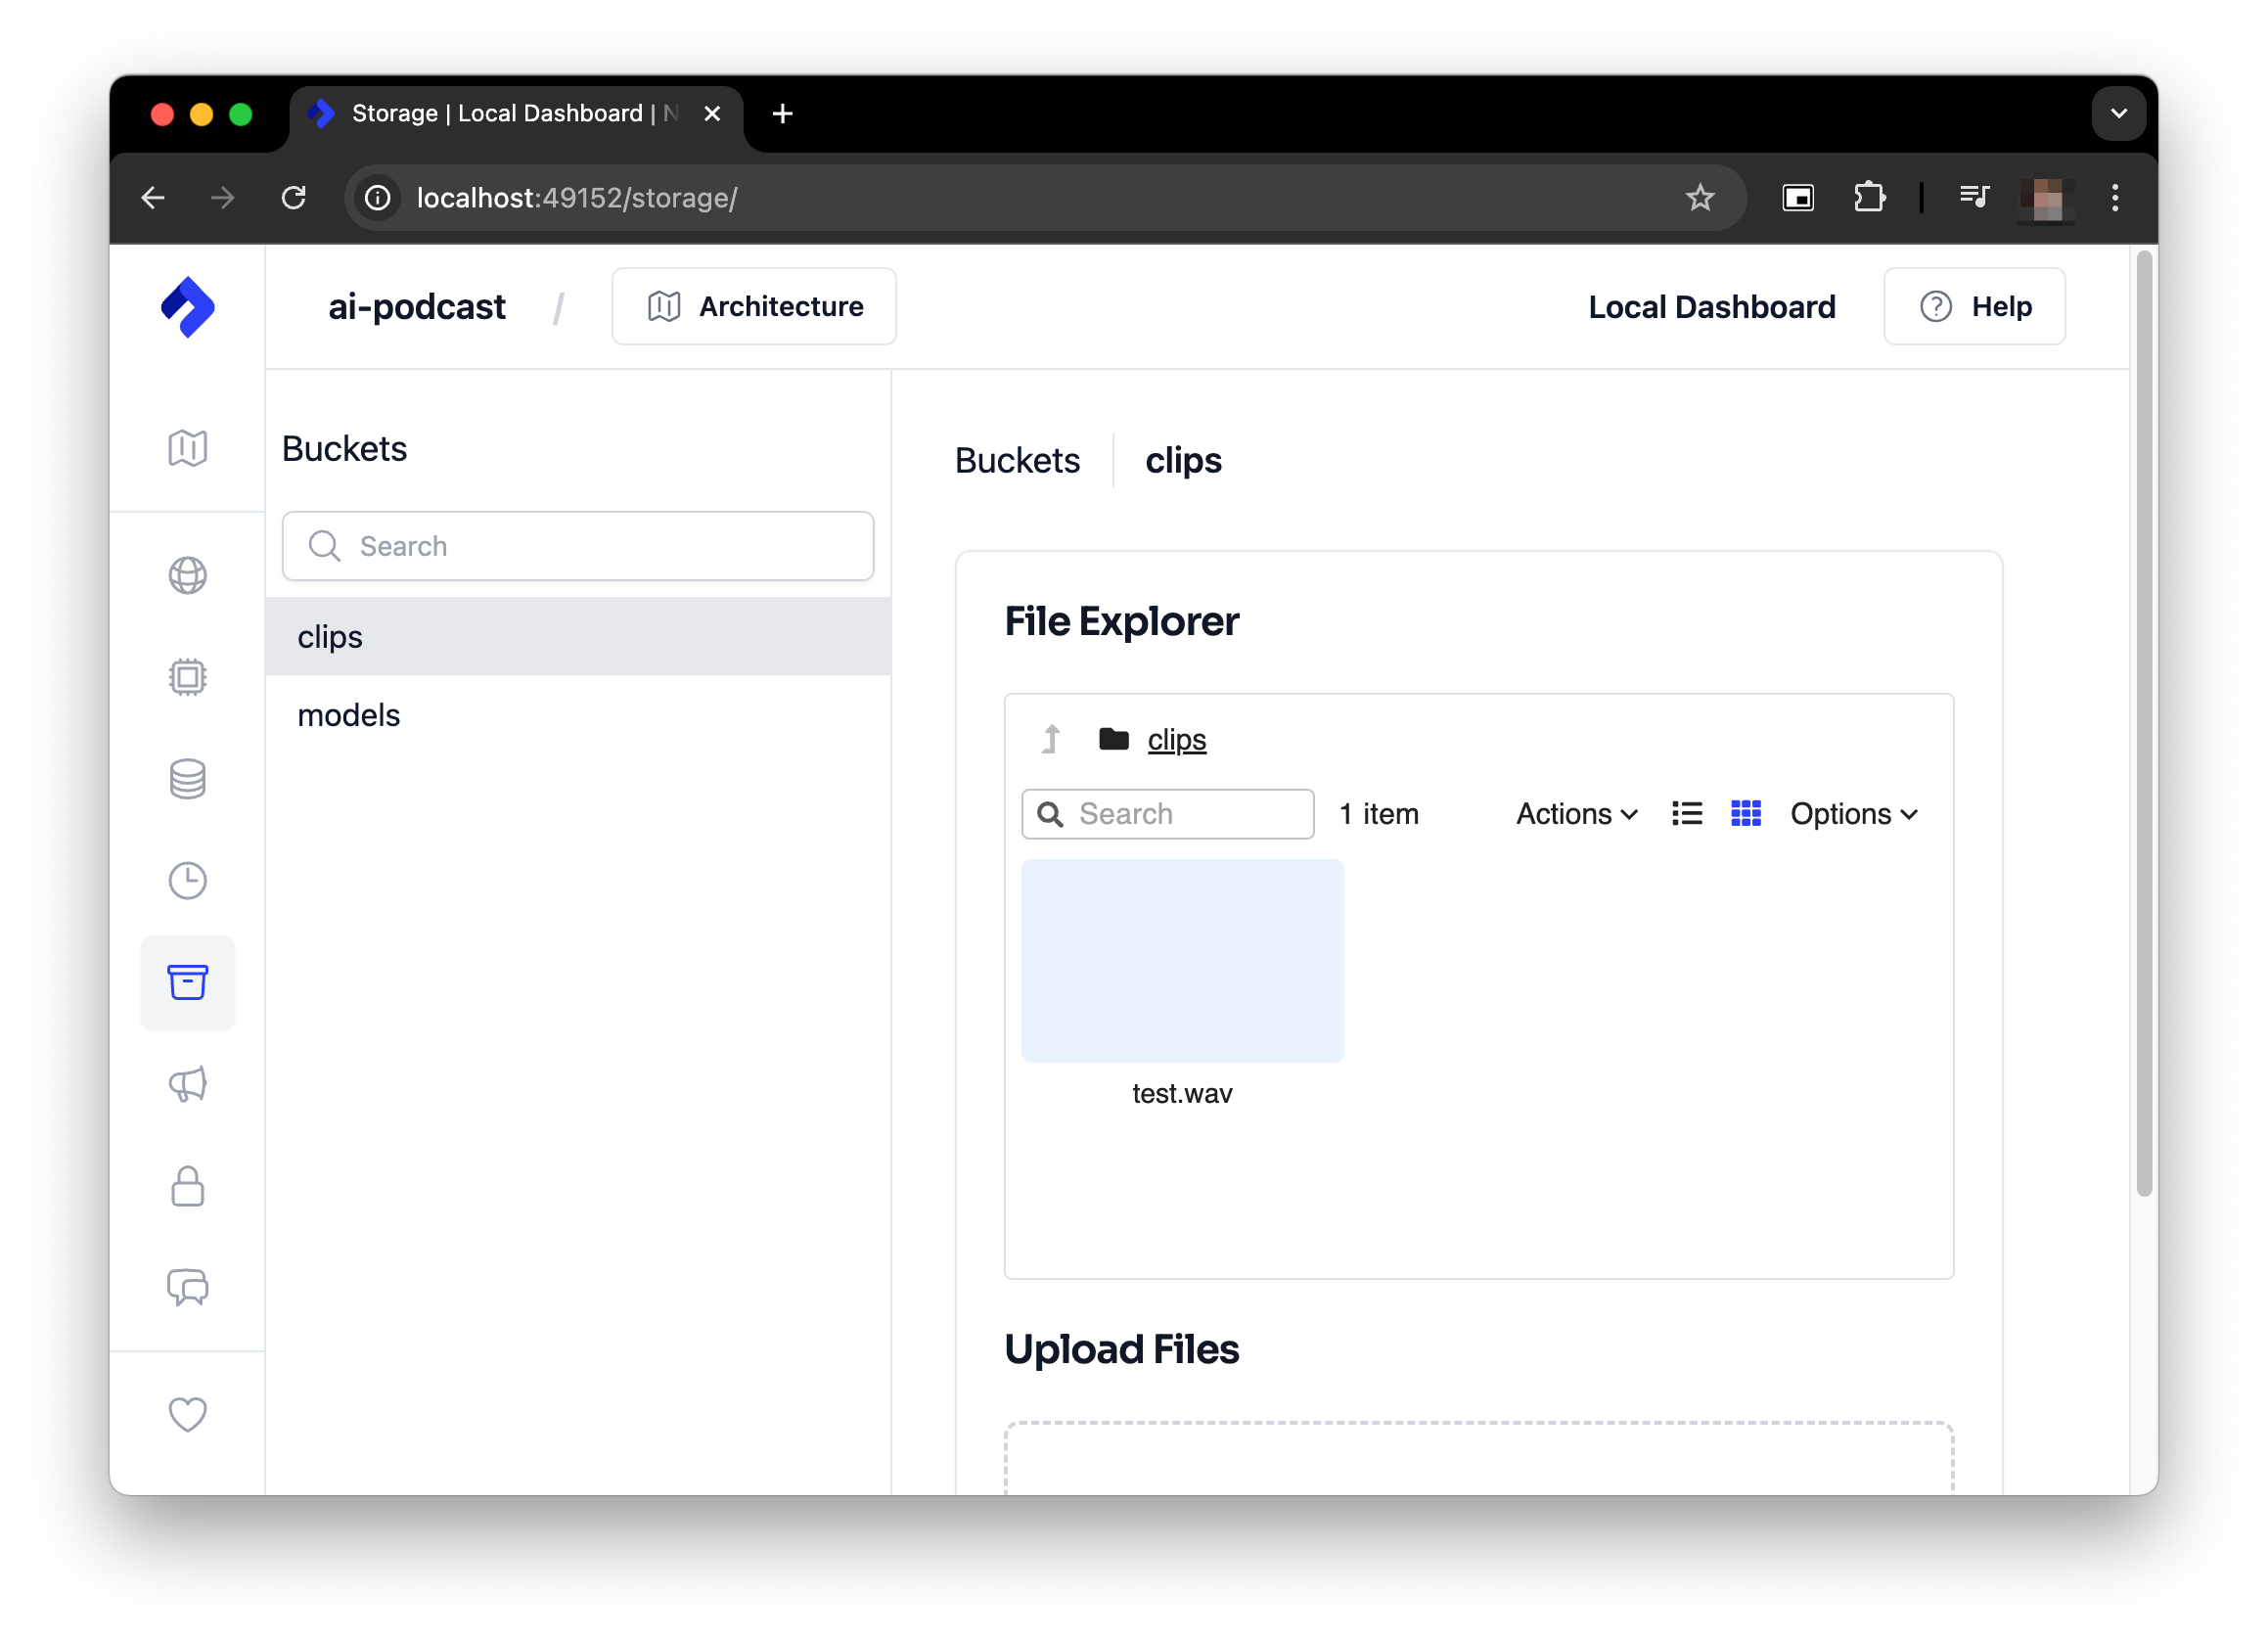
Once the generation is complete you should have something like this:
You can find your generated clip in the clips bucket in the Nitric Dashboard.
It can also be located in .nitric/run/buckets/clips directory of your project.
Feel free to play around with it a bit more before continuing on. It can be fun to experiment with different text inputs and see what the model generates.
Prepare to deploy to the cloud
Before we can deploy our project to the cloud we need to make a few changes. First, we want to be able to cache models to be used between runs without having to pull them from Hugging Face each time.
This is why we added the models bucket and download topic initially. It's time to use them. Let's add the download topic subscriber and api endpoint to services/api.py.
from common.resources import (main_api, model_dir, cache_dir, zip_path,gen_audio_job, download_audio_model_topic, models_bucket)from nitric.application import Nitricfrom nitric.context import HttpContext, MessageContextfrom huggingface_hub import snapshot_downloadimport osimport zipfileimport requestsmodels = models_bucket.allow('write', 'read')generate_audio = gen_audio_job.allow('submit')download_audio_model = download_audio_model_topic.allow("publish")audio_model_id = "suno/bark"default_voice_preset = "v2/en_speaker_6"@download_audio_model_topic.subscribe()async def do_download_audio_model(ctx: MessageContext):model_id: str = ctx.req.data["model_id"]print(f"Downloading model to {model_dir}")dir = snapshot_download(model_id,local_dir=model_dir,cache_dir=cache_dir,allow_patterns=["config.json","generation_config.json","pytorch_model.bin","speaker_embeddings_path.json","special_tokens_map.json","tokenizer.json","tokenizer_config.json","vocab.txt"])print(f"Downloaded model to {dir}")# zip the model and upload it to the bucketprint("Compressing models")# zip the modelwith zipfile.ZipFile(zip_path, 'w', zipfile.ZIP_STORED) as zip_file:for root, dirs, files in os.walk(dir):for file in files:file_path = os.path.join(root, file)archive_name = os.path.relpath(file_path, start=dir)print(f"Adding {file_path} to zip as {archive_name}")zip_file.write(file_path, archive_name)# upload the model to the bucketmodule_url = await models.file(f"{model_id}.zip").upload_url()with open(zip_path, "rb") as f:requests.put(module_url, data=f, timeout=6000)os.remove(zip_path)print("Successfully cached model in bucket")@main_api.post("/download-model")async def download_audio(ctx: HttpContext):model_id = ctx.req.query.get("model", audio_model_id)if isinstance(model_id, list):model_id = model_id[0]# asynchronously download the modelawait download_audio_model.publish({ "model_id": model_id })@main_api.post("/audio/:filename")async def submit_auto(ctx: HttpContext):name = ctx.req.params["filename"]model_id = ctx.req.query.get("model", audio_model_id)preset = ctx.req.query.get("preset", default_voice_preset)if isinstance(model_id, list):model_id = model_id[0]model_downloaded = await models.exists(f"{model_id}.zip")if not model_downloaded:ctx.res.status = 404ctx.res.body = f'model \'{model_id}\' hasn\'t been downloaded yet, call POST: /download-model to pre-download the model'returnif isinstance(preset, list):preset = preset[0]body = ctx.req.dataif body is None:ctx.res.status = 400returnprint(f"using preset {preset}")await generate_audio.submit({"file": name, "model_id": model_id, "text": body.decode('utf-8'), "preset": preset})Nitric.run()
We'll also update our audio generation job to download the model from the bucket before processing the audio.
from common.resources import model_dir, zip_path, gen_audio_job, clips_bucket, models_bucketfrom nitric.context import JobContextfrom nitric.application import Nitricfrom transformers import AutoProcessor, BarkModelimport scipyimport ioimport torchimport numpy as npimport requestsimport zipfileimport osclips = clips_bucket.allow("write")models = models_bucket.allow("read")# This defines the Job Handler that will process all audio generation jobs# using the job definition we created in the resources module@gen_audio_job(cpus=4, memory=12000, gpus=1)async def do_generate_audio(ctx: JobContext):file = ctx.req.data["file"]voice_preset = ctx.req.data["preset"]text: str = ctx.req.data["text"]model_id = ctx.req.data["model_id"]# Copy model from nitric bucket to local storageif not os.path.exists(model_dir):print("Downloading model")download_url = await models.file(f"{model_id}.zip").download_url()response = requests.get(download_url, allow_redirects=True, timeout=600)# make sure zip_path existsos.makedirs(os.path.dirname(zip_path), exist_ok=True)# save the zip filewith open(zip_path, "wb") as f:f.write(response.content)print("Unzipping model")with zipfile.ZipFile(zip_path, 'r') as zip_ref:zip_ref.extractall(model_dir)# cleanup zip fileprint("Cleaning up")os.remove(zip_path)print("Loading model")model = BarkModel.from_pretrained(f"{model_dir}")processor = AutoProcessor.from_pretrained(f"{model_dir}")print("Model loaded")print(f'Using voice preset {voice_preset}')# Split the text by sentences and chain the audio clips togethersentences = text.split(".")sentences = [sentence for sentence in sentences if sentence.strip() != ""]audio_arrays = []# for each sentence, generate the audio clipfor index, sentence in enumerate(sentences):# Insert pauses between sentences to prevent clips from running togetherinputs = processor(f"{sentence}...", voice_preset=voice_preset)if torch.cuda.is_available():inputs.to("cuda")model.to("cuda")else:print("CUDA unavailable, defaulting to CPU. This may take a while.")print(f"Generating clip {index + 1}/{len(sentences)}")audio_array = model.generate(**inputs, pad_token_id=0)audio_array = audio_array.cpu().numpy().squeeze()audio_arrays.append(audio_array)final_array = np.concatenate(audio_arrays)buffer = io.BytesIO()print("Encoding clip")sample_rate = model.generation_config.sample_ratescipy.io.wavfile.write(buffer, rate=sample_rate, data=final_array)print("Uploading clip")upload_url = await clips.file(f'{file}.wav').upload_url()# make a put request to the upload url# with the buffer as the body# and the content type as audio/wavrequests.put(upload_url, data=buffer.getvalue(), headers={"Content-Type": "audio/wav"}, timeout=600)print("Done!")Nitric.run()
If you like the download/cache step can also be rolled into the audio generation job. However having the download in a separate job is more cost effective as you won't be downloading and caching the model on an instance where you're also paying for a GPU.
Once that's done we can give the project another test, just to make sure everything is still working as expected.
If nitric isn't still running you can start it again with:
nitric start
First we'll make sure that our new model download code is working by running:
curl -X POST http://localhost:4001/download-model
Then we can test the audio generation again with:
curl -X POST http://localhost:4001/audio/test -d "Okay this is cool, but let's wait and see what comes next"
You should get a similar result to before. The main difference is that the model will be downloaded and cached in a nitric bucket before the audio generation starts.
Defining our service docker images
So that the AI workload can use GPUs in the cloud we'll need to make sure it ships with drivers and libraries to support that. We can do this by specifying a custom Dockerfile for our batch service under torch.dockerfile.
touch torch.dockerfile
# The python version must match the version in .python-versionFROM ghcr.io/astral-sh/uv:python3.11-bookworm-slim AS builderARG HANDLERENV HANDLER=${HANDLER}ENV UV_COMPILE_BYTECODE=1 UV_LINK_MODE=copy PYTHONPATH=.WORKDIR /appCOPY uv.lock pyproject.toml /app/RUN --mount=type=cache,target=/root/.cache/uv \--mount=type=bind,source=uv.lock,target=uv.lock \--mount=type=bind,source=pyproject.toml,target=pyproject.toml \uv sync --frozen -v --no-install-project --extra ml --no-dev --no-python-downloadsCOPY . /appRUN --mount=type=cache,target=/root/.cache/uv \uv sync --frozen -v --no-dev --extra ml --no-python-downloads# Torch dockerfile# Used for torch runtime based nitric batch services# Don't need to include the CUDA runtime as the nvidia pypi dep already ships with itFROM nvcr.io/nvidia/driver:550-5.15.0-1065-nvidia-ubuntu22.04ARG HANDLERENV HANDLER=${HANDLER}ENV PYTHONUNBUFFERED=TRUEENV PYTHONPATH="."ENV NVIDIA_DRIVER_CAPABILITIES=allENV NVIDIA_REQUIRE_CUDA="cuda>=8.0"RUN apt-get update -y && \apt-get install -y software-properties-common && \add-apt-repository ppa:deadsnakes/ppa && \apt-get install -y python3.11 && \ln -sf /usr/bin/python3.11 /usr/local/bin/python3.11 && \ln -sf /usr/bin/python3.11 /usr/local/bin/python3 && \ln -sf /usr/bin/python3.11 /usr/local/bin/python# Copy the application from the builderCOPY --from=builder --chown=app:app /app /appWORKDIR /app# Place executables in the environment at the front of the pathENV PATH="/app/.venv/bin:$PATH"# Run the service using the path to the handlerENTRYPOINT python -u $HANDLER
We'll also add a dockerignore file to try and keep the image size down.
touch torch.dockerfile.dockerignore
.mypy_cache/.nitric/.venv/.model/nitric-spec.jsonnitric.yamlREADME.mdmodel.zip
We'll also need to update the python.dockerfile to ignore the .model directory.
.mypy_cache/.nitric/.venv/.model/nitric-spec.jsonnitric.yamlREADME.mdmodel.zip
Let's also update the nitric.yaml to add the new dockerfile to our runtimes.
name: ai-podcastservices:- match: services/*.pystart: uv run watchmedo auto-restart -p *.py --no-restart-on-command-exit -R uv run $SERVICE_PATHruntime: pythonbatch-services:- match: batches/*.pystart: uv run watchmedo auto-restart -p *.py --no-restart-on-command-exit -R uv run $SERVICE_PATHruntime: torchruntimes:python:dockerfile: './python.dockerfile'torch:dockerfile: './torch.dockerfile'preview:- batch-services
With that, we're ready to deploy our project to the cloud.
Deploy to the cloud
To deploy our project to the cloud we'll need to create a new Nitric stack file for AWS (or GCP if you prefer). We can do this using the Nitric CLI.
nitric stack new test aws
This will generate a nitric stack file called test which defines how we want to deploy a stack to AWS. We can update this stack file with settings to configure our batch service and the AWS Compute environment it will run in.
provider: nitric/aws@1.15.4# The target aws region to deploy to# See available regions:# https://docs.aws.amazon.com/general/latest/gr/lambda-service.htmlregion: <enter-your-region>batch-compute-env:min-cpus: 0max-cpus: 4instance-types:- g5 # Or use another instance type that supports GPUs- optimal# Customize the ECS launch template for this compute environmentconfig:default:lambda:# increase ephemeral storage size to allow for largish model filesephemeral-storage: 10000memory: 1024timeout: 900
You will need to setup your machine to deploy to AWS. See the Nitric Pulumi AWS Provider documentation for more information.
Requesting a G instance quota increase
Most AWS accounts will not have access to on-demand GPU instances (G Instances), if you'd like to run models using a GPU you'll need to request a quota increase for G instances.
If you prefer not to use a GPU you can set gpus=0 in the @gen_audio_job decorator in batches/podcast.py.
Important: If the gpus value in batches/podcast.py exceeds the number of
available GPUs in your AWS account, the job will never start. If you want to
run without a GPU, make sure to set gpus=0 in the @gen_audio_job
decorator. This is just a quirk of how AWS Batch works.
If you want to use a GPU you'll need to request a quota increase for G instances in AWS.
To request a quota increase for G instances in AWS you can follow these steps:
- Go to the AWS Service Quotas for EC2 page.
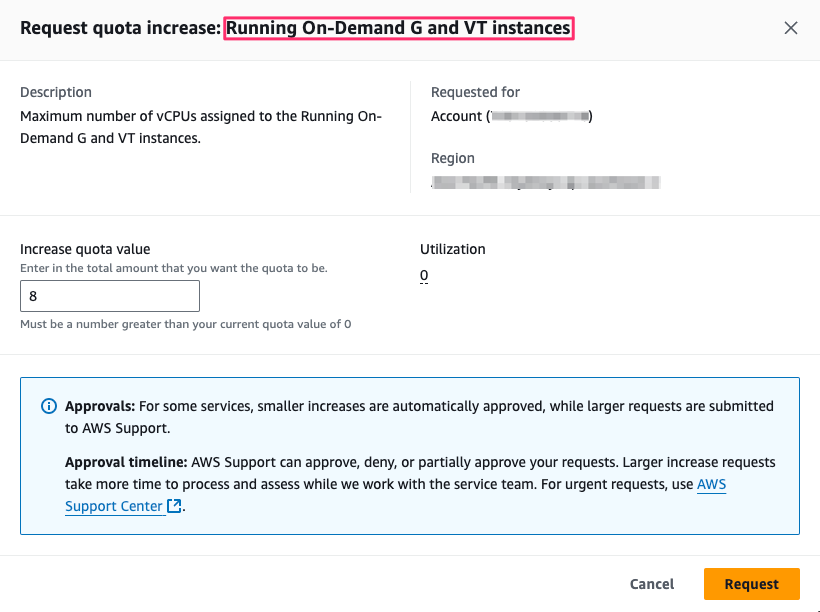
- Find/Search for Running On-Demand G and VT instances
- Click Request quota increase
- Choose an appropriate value, e.g. 4, 8 or 16 depending on your needs
Once you've requested the quota increase it may take time for AWS to approve it.
Deploy the project
Once the above is complete, we can deploy the project to the cloud using:
nitric up
The initial deployment may take time due to the size of the python/Nvidia driver and CUDA runtime dependencies.
Once the project is deployed you can try out some generation, just like before depending on the hardware you were running on locally you may notice a speed up in generation time.
Running the project in the cloud will incur costs. Make sure to monitor your usage and shut down the project if you're done with it.
Running on g5.xlarge from testing this project will cost ~$0.05/minute of audio you generate. Based on standard EC2 pricing for US regions.
You can see the status of your batch jobs in the AWS Batch console and the model and audio files in the AWS S3 console.
Next steps
In part two of this guide we'll look at adding an LLM agent to our project to automatically generate scripts for our podcasts from small prompts.
Have feedback on this page?
Open GitHub Issue