Building a Survey Backend with Nitric and TypeScript
This guide shows you how to build a backend for capturing, storing, and delivering survey responses using the Nitric framework. The application accepts survey submissions, generates PDF receipts, and delivers them asynchronously.
API Overview
| Method | Route | Description |
|---|---|---|
POST | /forms/[formId] | Submit a response to a specific form |
GET | /receipts/[id] | Retrieve a generated receipt by ID |
Under the hood, the system also handles events via topics and handlers for generating PDFs and delivering them.
Prerequisites
- Node.js
- The Nitric CLI
- (optional) Your choice of an AWS, GCP or Azure account
Project Setup
Create a new Nitric project using the TypeScript starter:
nitric new surveys-backend ts-startercd surveys-backendnpm install
You can now delete all files in the services/ folder, we'll create new services in this guide.
Add Runtime Type Safety
This project uses:
- Zod to define and validate the structure of form submissions.
- pdfkit to generate PDFs from html templates.
Install Zod
npm install zod pdfkit
Define a schema for form submissions
Create a file at form/schema.ts:
import { z } from 'zod'export const feedbackSchema = z.object({name: z.string(),rating: z.number().min(1).max(5),feedback: z.string().optional(),})export const rsvpSchema = z.object({name: z.string(),attending: z.boolean(),guests: z.number().int().min(0),})export const formSchemas: Record<string, z.ZodObject<any>> = {feedback: feedbackSchema,rsvp: rsvpSchema,}
Feedback Schema: Validates that submissions include a name (string), a rating (number between 1 and 5), and optional feedback (string). RSVP Schema: Validates that submissions include a name (string), an attending status (boolean), and the number of guests (non-negative integer).
Step 1: Define Resources
Create and configure the cloud resources your backend will use, such as storage buckets, queues, and key-value stores.
import { bucket, kv, topic } from '@nitric/sdk'export const output = bucket('receipts')export const submissions = kv('submissions')export const receipts = topic('form-submitted')
Step 2: Handle Submissions
Create an API route that validates and stores form submissions, then triggers further processing.
import { api } from '@nitric/sdk'import { submissions, receipts } from '../resources/resources'import { formSchemas } from '../form/schema'const formApi = api('forms')const formSubmissions = submissions.allow('set')const submittableReceipts = receipts.allow('publish')formApi.post('/forms/:formId', async (ctx) => {const formId = ctx.req.params.formIdconst schema = formSchemas[formId]if (!schema) {ctx.res.status = 400ctx.res.json({ msg: `Unknown formId: ${formId}` })return}const parsed = schema.safeParse(ctx.req.json())if (!parsed.success) {ctx.res.status = 400ctx.res.json({ msg: 'Invalid submission', errors: parsed.error.format() })return}const data = parsed.dataconst id = `${formId}-${Date.now()}`await formSubmissions.set(id, data)await submittableReceipts.publish({ id, formId })ctx.res.json({ msg: 'Submission received', id })})
Step 3: Generate PDF Receipts
Build a PDF receipt from the submission data using pdfkit.
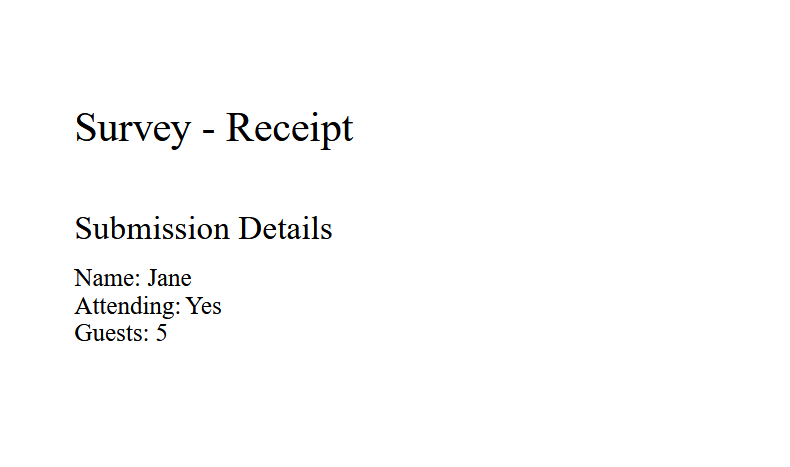
import PDFDocument from 'pdfkit'import { feedbackSchema, rsvpSchema } from './schema'import { z } from 'zod'type FeedbackSubmission = z.infer<typeof feedbackSchema>type RsvpSubmission = z.infer<typeof rsvpSchema>export const buildReceipt = async (data: any,formId: string,): Promise<Buffer> => {const receipt = new PDFDocument({ bufferPages: true })const doneWriting = new Promise<Buffer>((resolve) => {const buffers: Uint8Array[] = []receipt.on('data', buffers.push.bind(buffers))receipt.on('end', () => {const pdfData = Buffer.concat(buffers)resolve(pdfData)})receipt.font('Times-Roman').fontSize(20).text('Survey - Receipt', 100, 100)receipt.font('Times-Roman').fontSize(16).text('Submission Details', 100, 150)if (formId === 'feedback') {const { name, rating, feedback } = data as FeedbackSubmissionreceipt.font('Times-Roman').fontSize(12).text(`Name: ${name}Rating: ${rating}Feedback: ${feedback || 'N/A'}`,100,175,)} else if (formId === 'rsvp') {const { name, attending, guests } = data as RsvpSubmissionreceipt.font('Times-Roman').fontSize(12).text(`Name: ${name}Attending: ${attending ? 'Yes' : 'No'}Guests: ${guests}`,100,175,)} else {receipt.font('Times-Roman').fontSize(12).text('Unknown form type. No details available.', 100, 175)}receipt.end()})return await doneWriting}
Listen for submitted events and generate a formatted PDF receipt from the stored data.
import { submissions, receipts, output } from '../resources/resources'import { buildReceipt } from '../form/receipt'const formSubmissions = submissions.allow('get')const writeableOutput = output.allow('write')receipts.subscribe(async (ctx) => {const { id, formId } = ctx.req.json()const submission = await formSubmissions.get(id)if (!submission) {console.error(`No submission found for ID: ${id}`)return}// Build the PDF buffer from the submission dataconst buffer = await buildReceipt(submission, formId)// Store the PDF file in the bucketconst file = writeableOutput.file(`${id}.pdf`)await file.write(buffer)console.log(`Receipt stored for ${id}`)})
This PDF output is fairly plain, you can enhance it further using layout templates or branding.
Step 4: Delivery Logic
Simulate or perform delivery of the receipt (e.g. via email or other downstream systems).
import { receipts } from '../resources/resources'receipts.subscribe(async (ctx) => {const { id } = ctx.req.json()// Simulate delivery or hook into a real email/SaaS integrationconsole.log(`Delivering receipt for submission: ${id}`)})
Step 5: Retrieve Receipts
Create an endpoint that returns a download URL for the generated receipt file.
import { api } from '@nitric/sdk'import { output } from '../resources/resources'const receiptApi = api('receipts')const readableOutput = output.allow('read')receiptApi.get('/receipts/:id', async (ctx) => {const id = ctx.req.params.idconst file = readableOutput.file(`${id}.pdf`)const url = await file.getDownloadUrl()ctx.res.body = url})
Run and Test Locally
nitric start
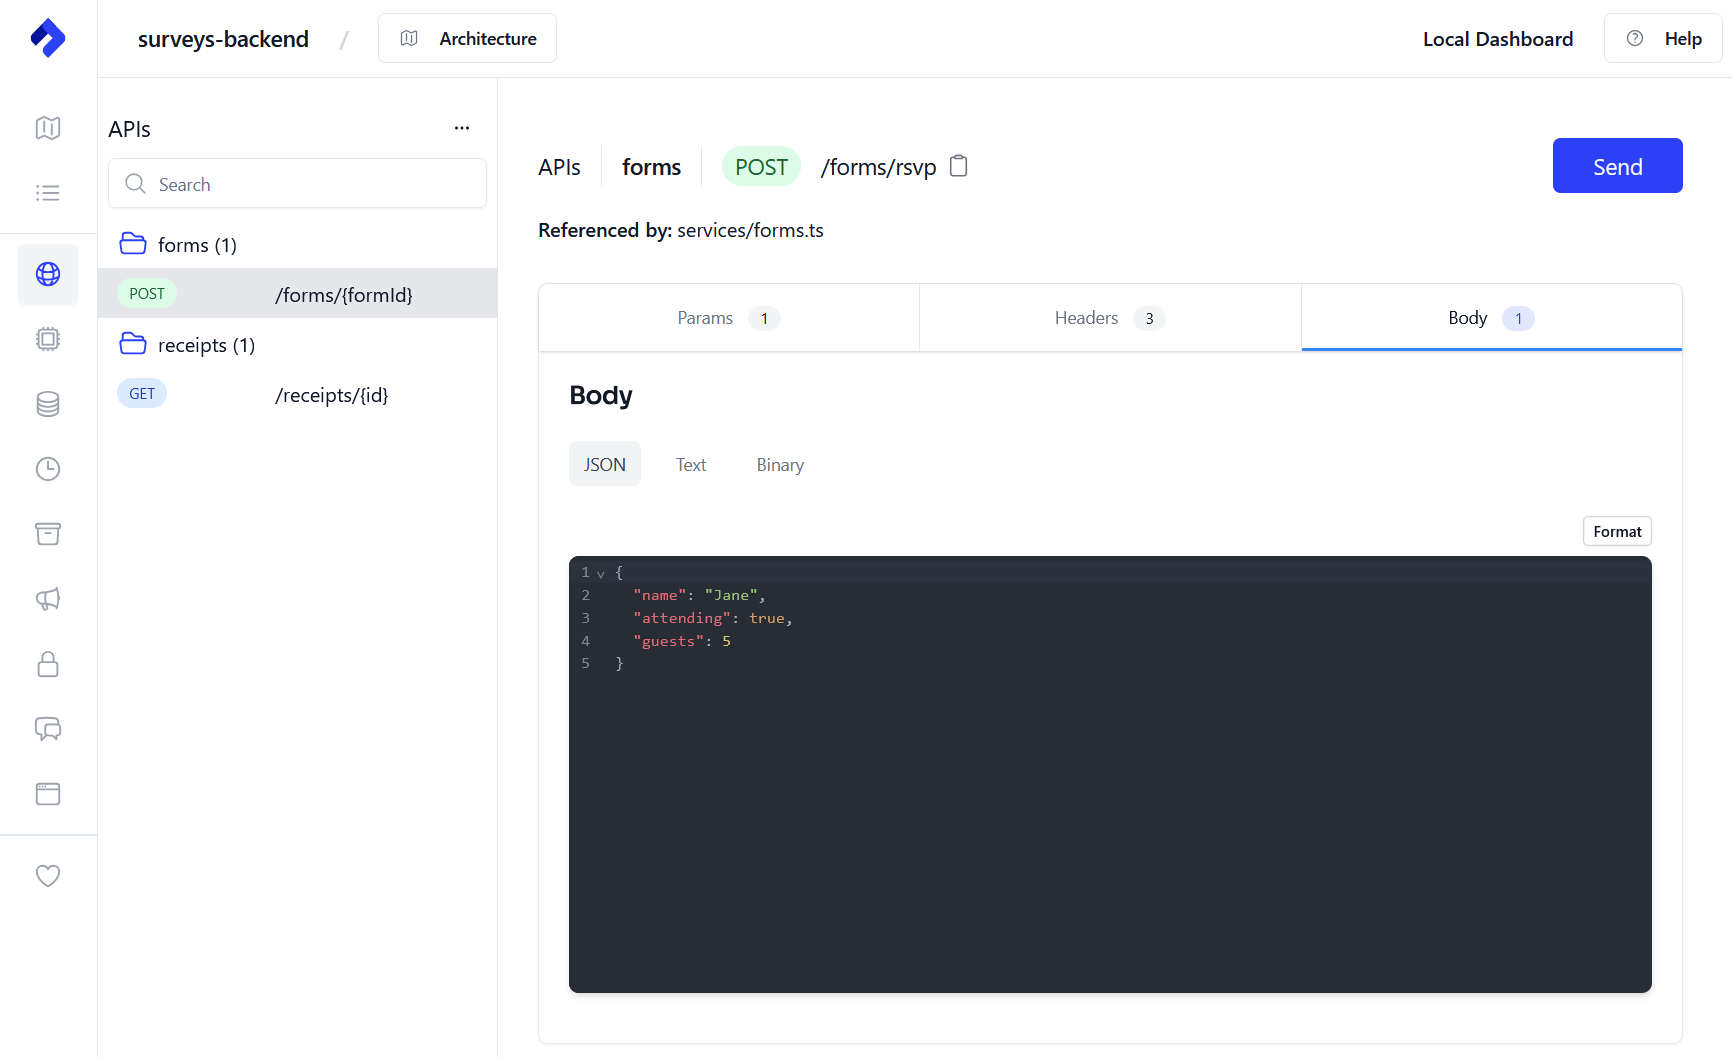
Submit a Survey
Use the Nitric dashboard to submit your survey data. In the path parameter, enter the formId you want to submit to (either "feedback" or "rsvp"). Then provide the survey data in the request body as JSON.
Form ID: feedback
{"name": "Jane","rating": 5,"feedback": "Great experience!"}
Form ID: rsvp
{"name": "Jane","attending": true,"guests": 5}
You should see messages in your console for PDF generation and delivery.
Delivering receipt for submission: rsvp-1746667675671Receipt stored for rsvp-1746667675671
Get a Receipt
Replace <timestamp> with the value returned from the submission.
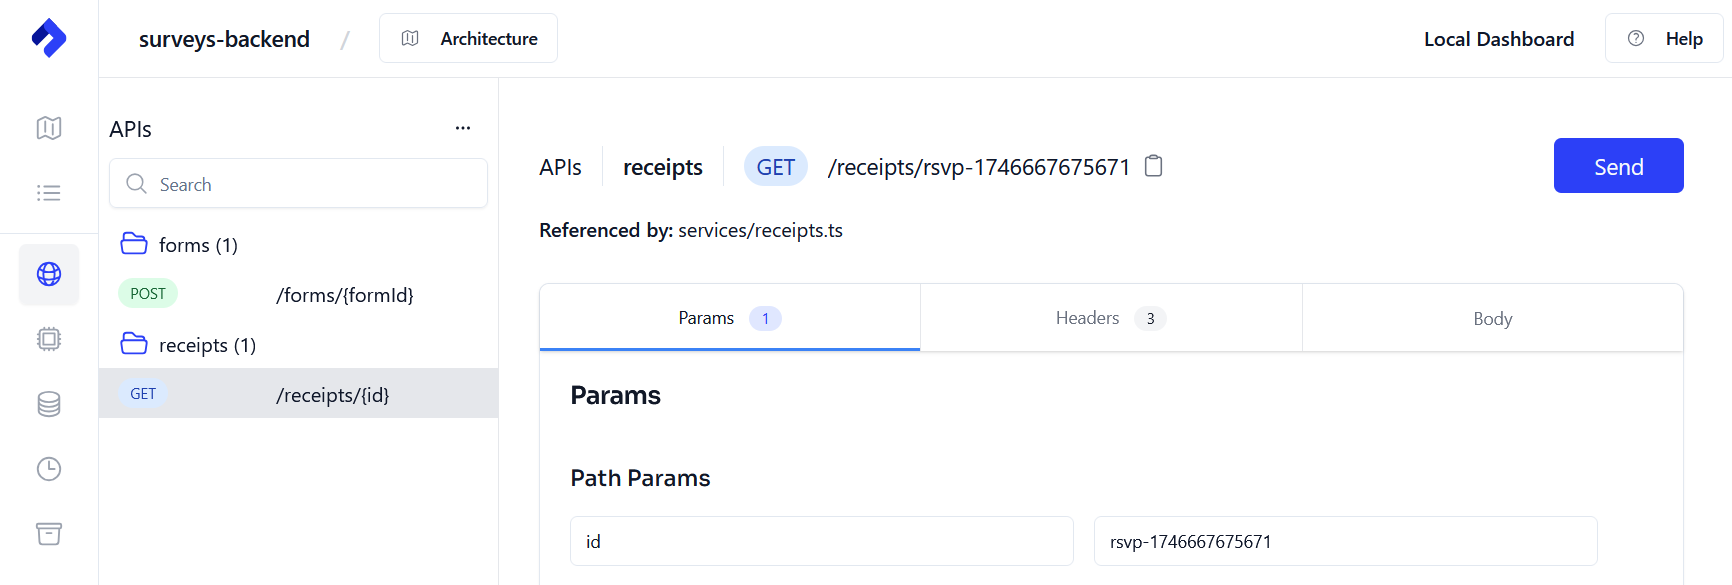
Use the URL in the response to retrieve your PDF:
Deploying to AWS
Create your stack
Create an AWS stack called aws-staging for your staging environment.
nitric stack new aws-staging aws
Inside the stack file, ensure you set your region.
provider: nitric/aws@latestregion: us-east-2
Deploy
Deploy to AWS using the nitric up command. Ensure you have set up your AWS credentials correctly.
nitric up
Tear down
To avoid unwanted costs of running your test app, you can tear down the stack using the nitric down command.
nitric down
Summary
In this guide, you built a backend for handling survey submissions using Nitric and TypeScript:
- Created a REST API to accept form submissions
- Validated user input using Zod
- Stored submissions in a key-value store
- Generated PDF receipts using pdfkit
- Stored the receipts in cloud storage
- Delivered them asynchronously via event topics
- Exposed a URL endpoint to retrieve generated receipts
What's next
- Build and deploy a website for your project.
Have feedback on this page?
Open GitHub Issue