Extend Supabase Apps with Nitric
What we'll be doing
In this guide we'll use the Nitric Framework with a Supabase project to build serverless services that can respond to Insert, Update or Delete operations in your Supabase tables.
This example sends welcome emails to new user profiles with SendGrid, but you could adapt the steps for other situations, like:
- Securely processing payments with Stripe
- Data aggregation
- Fanout or event-based workflows with Nitric queues, topics, and schedules
You could even go the other way and build powerful SaaS APIs with Nitric, connected to your Supabase backend. Or, use Nitric schedules to clean up old data in batches.
Want guides for the topics above? Great! Come and tell us what you need and we'll write it for you.
Prerequisites
- Node.js
- The Nitric CLI
- An account with Supabase
- An account with SendGrid
Create a Supabase project
We're assuming you're already using Supabase, but if not you can sign up for free.
Log into Supabase and create a new project. If you have an existing project you'd like to use, that'll be fine, just adapt the next few steps to match your existing project and table names.
Create a table
Next, let's create a profiles table to store basic profile information about our users such as their name and email address. You can add any other fields you'd like to this table as well.
In real scenario you'd probably relate this table to the auth.users table, but we'll keep things simple for the sake of the guide by creating a standalone profiles tables.
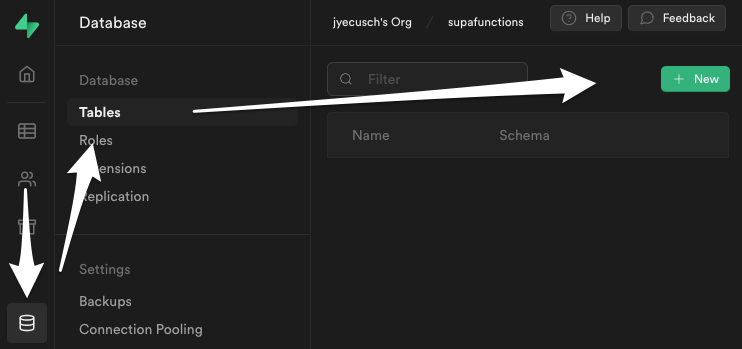
Navigate to database, then tables and click New
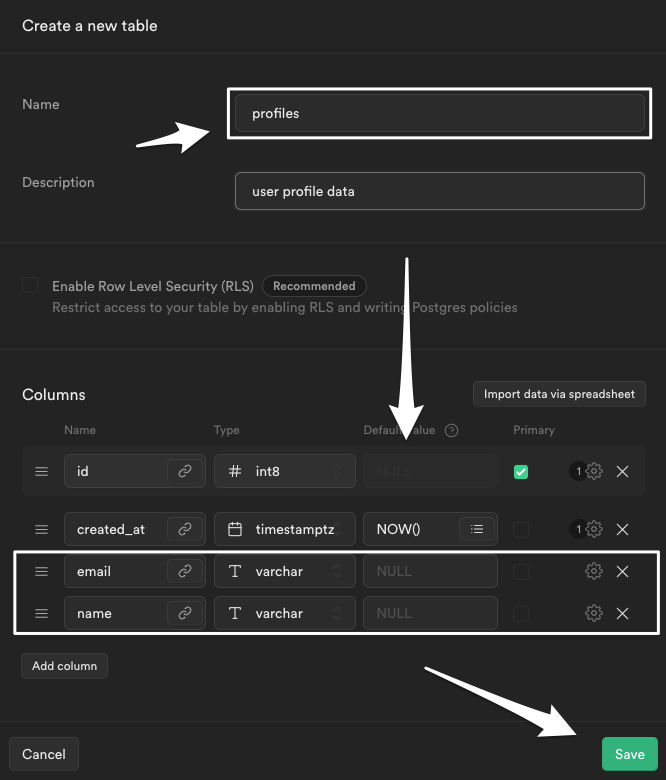
In the Name field enter profiles, then add the following columns to the table and click Save:
| Name | Type |
|---|---|
| varchar | |
| name | varchar |
That's all we need to do in Supabase for now. We'll come back to the project when it's time to link everything together.
Sign up to SendGrid
Since this tutorial uses SendGrid to send user welcome emails, let's setup an account with SendGrid
Once you have an account an easy way to get started is with their Email API Guide. We'll walk through a few of the steps from that guide here, but check it out for yourself for more detail.
To send emails with SendGrid you need to setup a verified "sender", which is the email address the messages will be sent from. We'll use Single Sender Verification for simplicity.
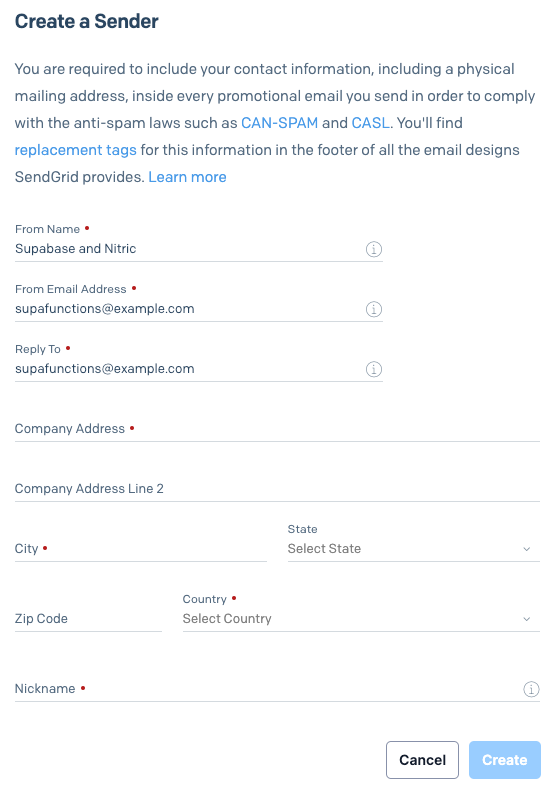
If you see the Create a Single Sender button already, go ahead and click it. Otherwise, navigate to the Sender Authentication page and click Verify a Single Sender. A modal will be displayed to capture the sender's details.
Complete the sender's information and click Create. You'll receive a link in a confirmation email to the sender From address which you'll need to click.
Now that you have a verified sender setup, let's generate a SendGrid API key for use in the app. Navigate to the API Keys page and click Create API Key.
In the modal enter a name for your API Key e.g. "Supabase Tutorial", select Full Access and click Create & View.
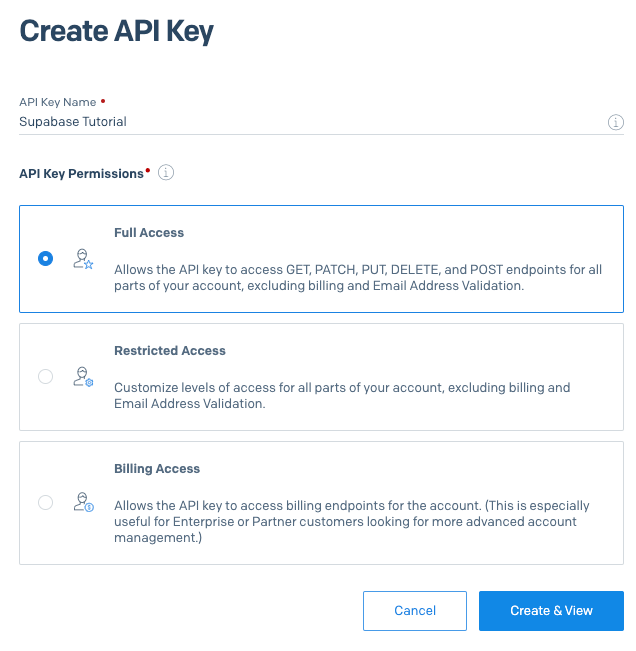
The API Key will be displayed on screen starting with SG., take note of it since we'll need it later.
The API key can only be displayed once, make sure you note it down or you'll need to generate it again later.
Create .env file and put the key in it.
Create a new Nitric project
Now that Supabase and SendGrid are both setup, let's create a new Nitric project to build the welcome email function.
You'll need the Nitric CLI for the next steps, if you haven't installed it yet follow the installation instructions.
Create a Nitric JavaScript project using the new command:
nitric new welcome-guide js-starter
Next, let's navigate to the project directory and install the npm dependencies:
cd welcome-guidenpm install
For this project we'll also want to install the @sendgrid/mail and dotenv packages to work with SendGrid and .env files respectively.
npm install @sendgrid/mail dotenv
The starter template comes with an example service called services/hello.js, let's rename that file to services/welcome.js so it matches what we're going to build.
mv services/hello.js services/welcome.js
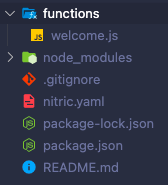
With those steps complete, your project should look like this:
Update the welcome service
Open services/welcome.js in your editor and replace the file contents with this:
import 'dotenv/config'import sendgrid from '@sendgrid/mail'import { api } from '@nitric/sdk'sendgrid.setApiKey(process.env.SENDGRID_API_KEY)const sender = process.env.SENDGRID_SENDERconst payApi = api('notifications')payApi.post('/welcome', async ({ req, res }) => {if (req.headers['x-api-key'] !== process.env.API_KEY) {res.status = '401'res.body = 'Unauthorized'return}const { email, name } = req.json().recordconst msg = {to: email,from: sender,subject: 'Welcome to Nitric!',text: `Hi ${name}, thanks for joining, we're so glad you're here!`,html: `<h1>Welcome!</h1><br /><p>Hi ${name},<br />Thanks for joining, we're so glad you're here!</p>`,}await sendgrid.send(msg)console.log(`welcome sent to: ${email}`)})
Let's breakdown what the code above is doing.
First, we import dotenv/config so that environment variables are automatically loaded from .env files.
import 'dotenv/config'
Next, we setup the SendGrid client by providing it with an API key stored in the SENDGRID_API_KEY environment variable, which we'll create later. We also retrieve the sender email address from the SENDGRID_SENDER variable, which is used as the from email address.
import sendgrid from '@sendgrid/mail'sendgrid.setApiKey(process.env.SENDGRID_API_KEY)const sender = process.env.SENDGRID_SENDER
After that, we create a new Nitric API and set it up with handler for POST requests to /welcome. This handler checks for an API key in the request headers, which helps make sure that only our Supabase project can make these requests. Then, it pulls the user emails address and name from the record object in the POST request body and uses those values to send the user an email.
import { api } from '@nitric/sdk'const payApi = api('notifications')payApi.post('/welcome', async ({ req, res }) => {if (req.headers['x-api-key'] !== process.env.API_KEY) {res.status = '401'res.body = 'Unauthorized'return}const { email, name } = req.json().recordconst msg = {to: email,from: sender,subject: 'Welcome to Nitric!',text: `Hi ${name}, thanks for joining, we're so glad you're here!`,html: `<h1>Welcome!</h1><br /><p>Hi ${name},<br />Thanks for joining, we're so glad you're here!</p>`,}await sendgrid.send(msg)console.log(`welcome sent to: ${email}`)})
Create the .env file
There are plenty of ways to setup environment variables, but we'll keep it simple here with a .env file.
In the root of your Nitric project create a new file named .env, then copy the following into the file:
# SendGrid DetailsSENDGRID_API_KEY=SENDGRID_SENDER=# API Key shared between Nitric and SupabaseAPI_KEY=
Update these variables in this file with your own values.
| Variable | Description |
|---|---|
| SENDGRID_API_KEY | This is the API Key you created with SendGrid earlier, starting with SG. |
| SENDGRID_SENDER | This is the verified send email address you setup earlier, e.g. you@example.com |
| API_KEY | This is shared secret with your Supabase app, for the purposes of this guide you can use any string (just make one up or use a UUID). ⚠️ In production this value should be something cryptographically secure, so it's hard to guess or brute force. |
Run the API locally
At this point everything in your Nitric services should be ready to go. You can test that it's all working by running the services locally and making POST requests to the API route.
Start the services:
nitric start
In another terminal or HTTP client, send POST requests to the API:
# Note: update the email address and x-api-key header with your own valuescurl -X POST http://localhost:4001/welcome \-H 'Content-Type: application/json' \-H 'x-api-key: YOUR_API_KEY' \-d '{"record":{"email":"you@example.com","name":"Your Name"}}'
Sending this request should result in an email being sent to your inbox.
If you don't receive the email, make sure to check your junk folder. They can sometimes end up there for new senders or unverified domains.
Bringing it all together
Here we are in the home stretch! For this last section we'll get your Supabase app connected to your Nitric services, so that every new record in the profiles table results in a welcome email being sent to the user.
You could deploy your app to a cloud provider like AWS, but for development, let's just connect your Supabase project to your local development server. One neat tool for doing this is called Ngrok. Ngrok can forward requests from a public URL to a port on your local machine.
You can install ngrok with npm like so:
npm install --save-dev ngrok
Next, let's connect it to your local Nitric api server, which should already running on port 4001:
npm run ngrok http 4001
The output from ngrok will look something like this:
ngrok by @inconshreveable (Ctrl+C to quit)Session Status onlineSession Expires 1 hour, 59 minutesVersion 2.3.40Region United States (us)Web Interface http://127.0.0.1:4040Forwarding http://61f5-194-193-39-11.ngrok.io -> http://localhost:9001Forwarding https://61f5-194-193-39-11.ngrok.io -> http://localhost:9001Connections ttl opn rt1 rt5 p50 p900 0 0.00 0.00 0.00 0.00
You can see in this example that the URL http://61f5-194-193-39-11.ngrok.io is being forwarded to port 4001 on my local machine. When you run it, the URL will be different, so take note of that value.
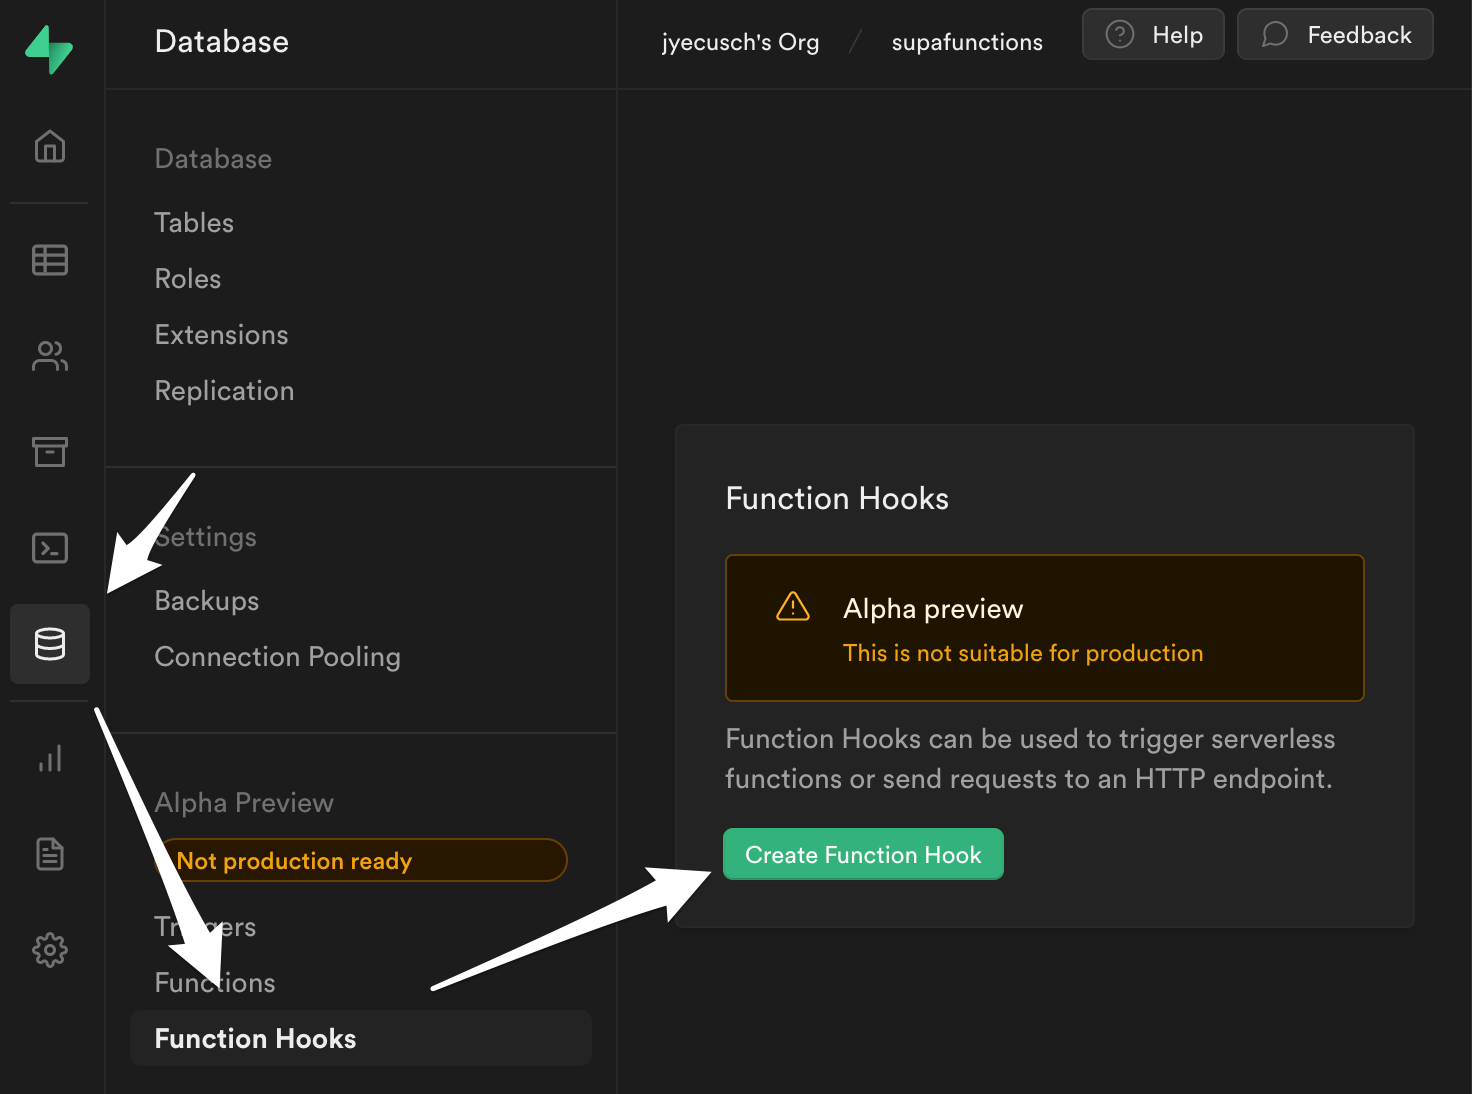
In Supabase, navigate to database, Function Hooks, then click Create Function Hook
You'll need to enable Function Hooks first if this is the first time you're using them in the project
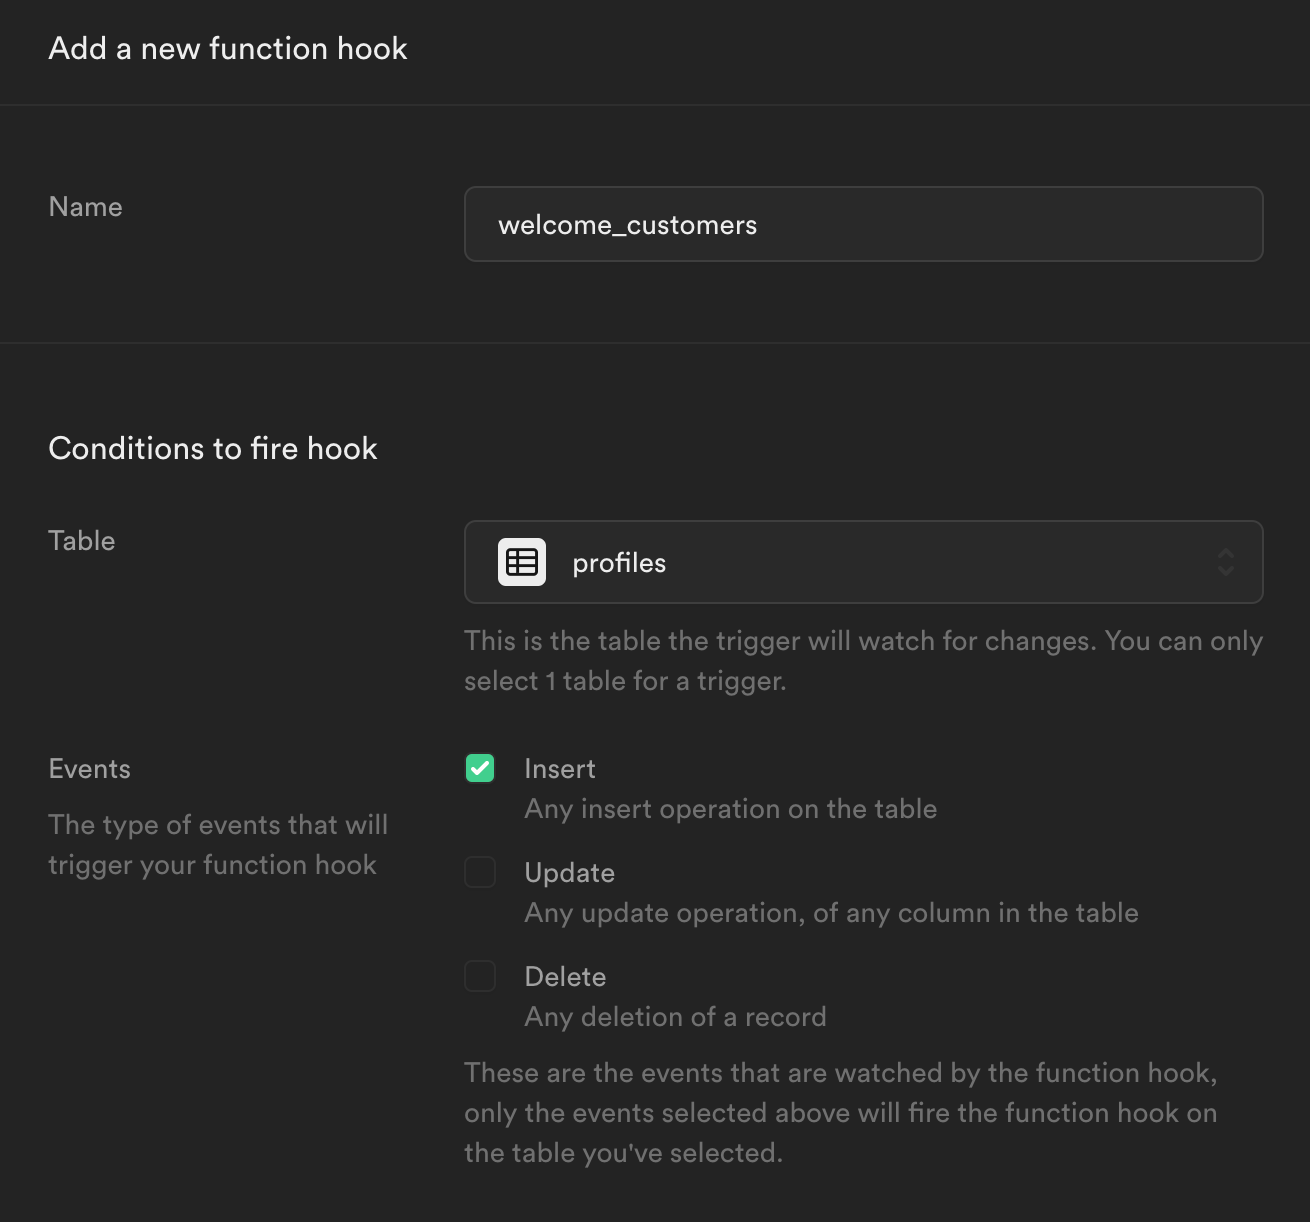
Give the function hook a new, such as welcome_customers, then select the profiles table and check Insert as the type of event to trigger your function hook:
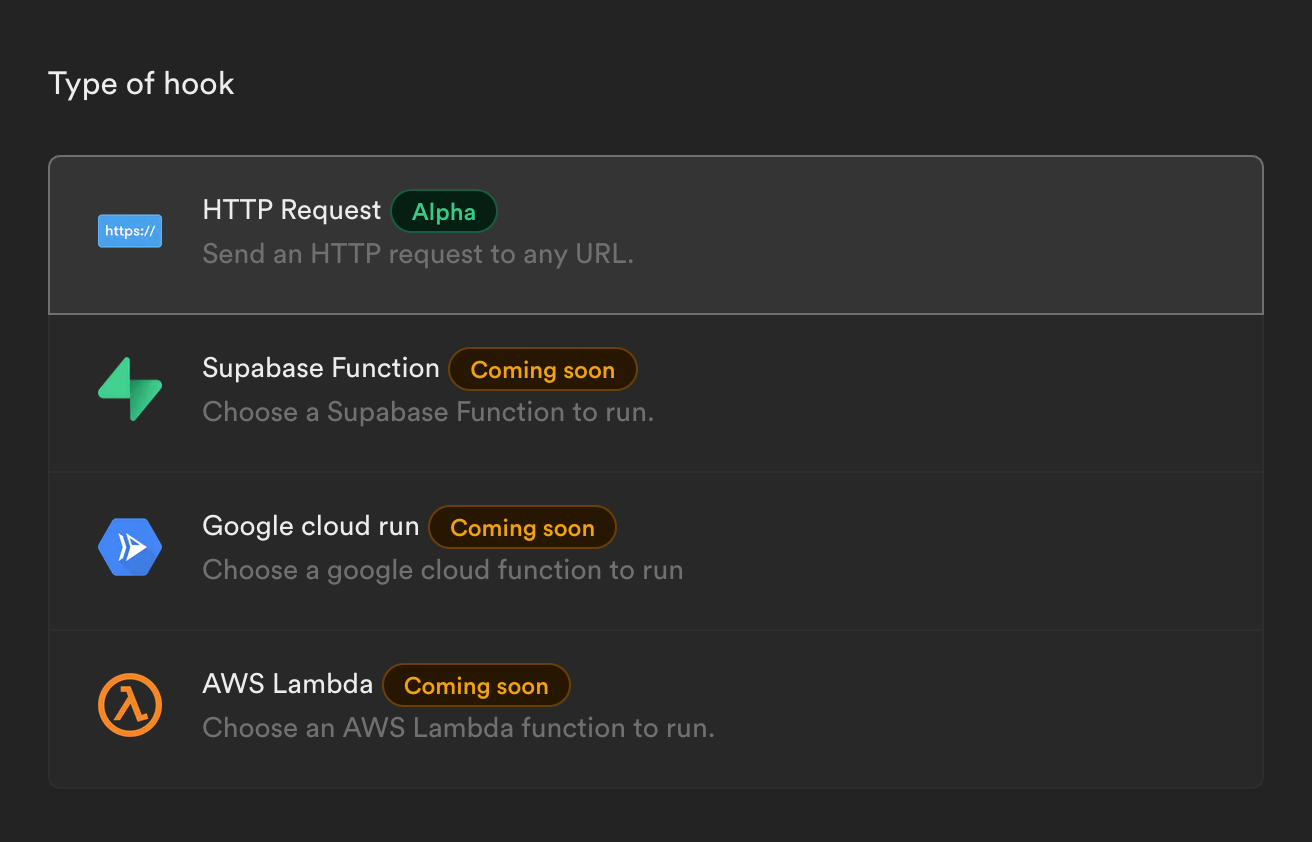
For Type of hook select HTTP Request:
Finally, for HTTP Request choose the POST method, enter your ngrok URL followed by /welcome, and under HTTP Headers add a new header named x-api-key, setting it's value to match the API_KEY environment variable you created earlier:
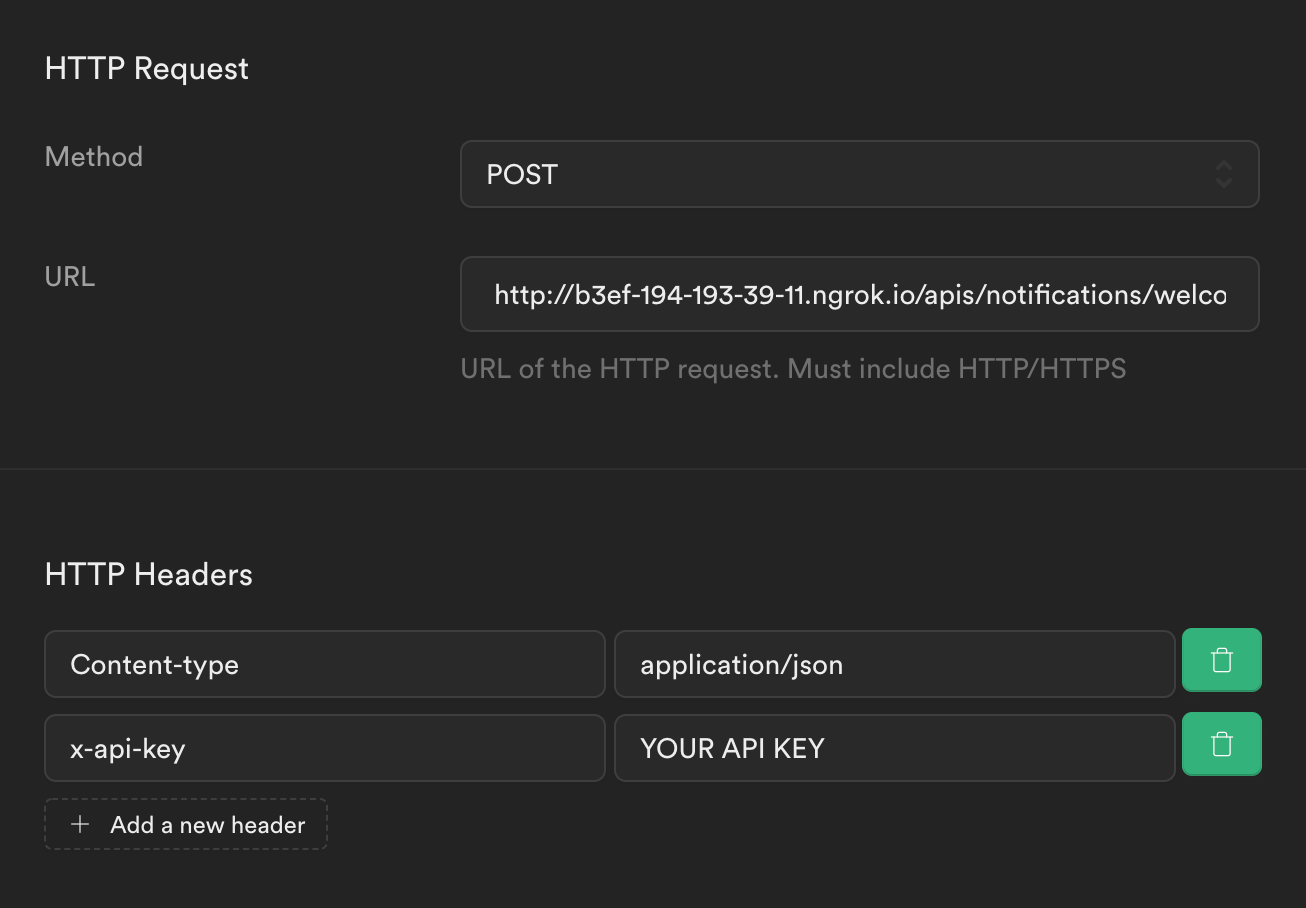
Click Confirm to save the hook and you're done!
Test your Function Hook
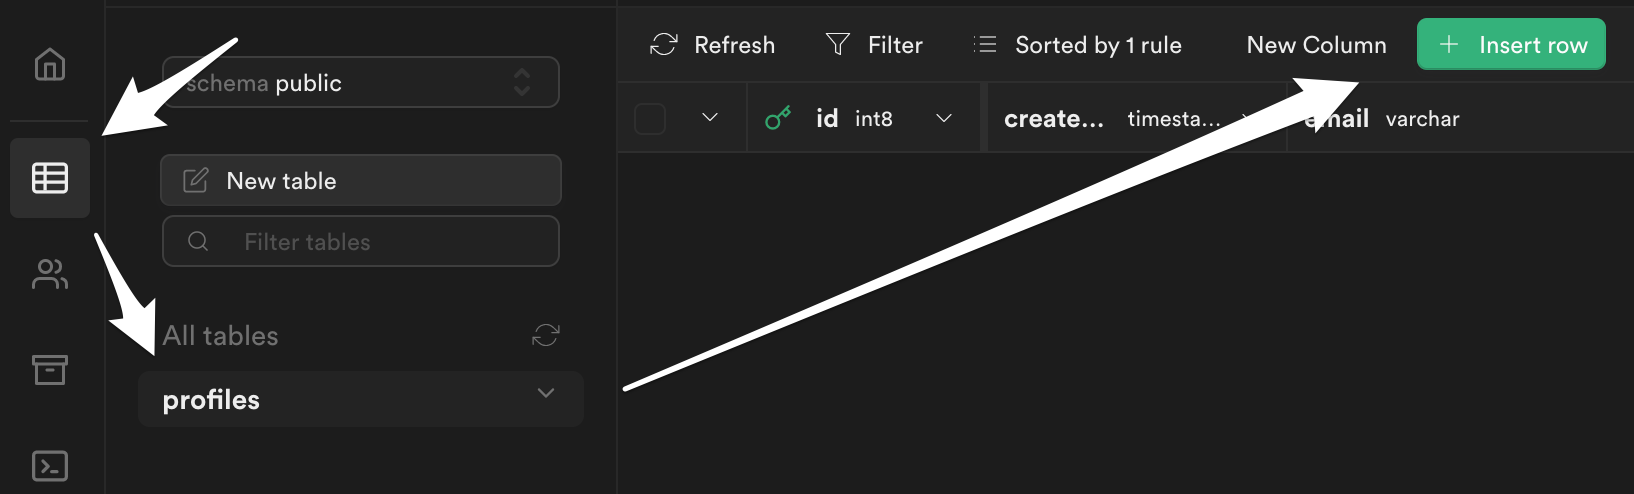
You can now test that your Function Hook is working by adding a new record to the profiles table. An easy way to do that is with the Supabase Table Editor. Navigate to the Table Editor, select the profiles table and click Insert row:
That's it!
Have feedback on this page?
Open GitHub Issue